
Selvages…all of those little edges that we have been trimming off for years. Now they are cuter, and we have something to do with them…make scrappy things!
I have been saving them for years and have been gifted bags of them, and even have been known to pull some out of the trash at guild meetings and retreats. I have made various things with them, but usually I make hotpads or coasters… things that look like this.

I start by getting a square of heat-resistant insulated padding (I use Insul-Brite) cut to about 9 inches square. Next I draw few diagonal lines as guidelines. You could make the selvages run parallel to an edge, but I like the diagonals. The lines help me to not get too wonky.

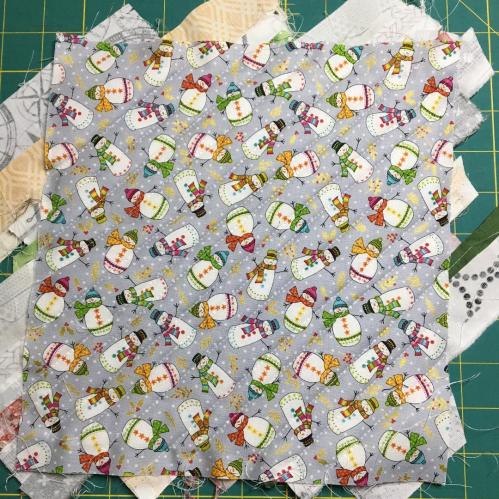
Next up is the backing fabric. I just got a free fat quarter of snowman fabric so I thought that it would make a good winter backing. Cut the square just a bit larger than the padding and place the padding on the wrong side of the backing fabric.
I have lots and lots of selvages, so I am using that backing as my inspiration and I go through my pile and pull out 15-20 of them and give them a good press.

Although it would seem that it would make sense to start at one end and proceed to the other, I find that my rows become crooked and that it works fine to start in the middle and work out both ways from there. I place the first piece across the diagonal.

and then another on top of it and stitch very close to the edge.

Sometimes I like to use my edge foot presser foot (#10 on a Bernina) to help to keep the stitching an even distance from the edge but still close to the edge, but have found that the inner notch of my quarter inch foot works fine too.

From there I keep adding layers and sewing them down to finish one half of the square.


To start the remaining half, I lift up the middle selvage and slide the next selvage under it and then put the first one down and stitch.


I tend to leave wider selvages for the corners, knowing that some will be trimmed off. When the selvages are all sewn down, it will look like this, front and back.

And then it is time to trim. I want this to be the same size as some other hotpads so I am trimming to 8.5 inches.


Time to add the binding and then I am done. And now I have three!


Give it a try – these are lots of fun!


These look fun to make and a nice way to use selvages!