Yes, I am still here and can’t believe that it has been over a year since I have posted anything. It is not exactly that I don’t have time. Hello, pandemic? I am around home most of the time. Have I been sewing? Yup. To catch up a little, why don’t I try with a theme.
Things that hold things. I like them. Always have and probably always will. I have lots of little boxes and bowls, pouches, totes, etc. Recently I made three more. Go figure.
For some reason I decided to make a rice pouch using the pattern by kzstevens. The pattern uses a pieced panel for the bag, but I settled on an Artisan solid fabric and then stitched the same design I had done on a pouch a few years back. All in all, it came together smoothly, however I forgot how much thread is used in the weaving part of the design. I thought that I was going to run out of the lighter blue thread, but fortunately won at this version of thread chicken.
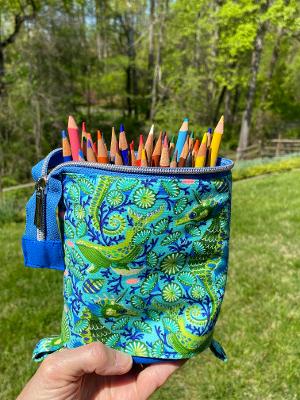
And then I was looking at cute pouches to corral my colored pencils etc. Most of the cardboard boxes fall apart after a while. I was initially looking at a slide down pouch, and then saw that By Annies had a pattern for a fold down standing pouch called Flipping Out, so I started with that one. It looks like this closed…
And like this when opened.
The pattern makes a large and a small size and being me, I could not leave well enough alone, so I basically made it the width of the large case but the height of the small one. They recommended trying the large one first, but it was so tall that I thought that I would never use it. Attaching the base is a bit fiddly so I knew that doing that on the small one would be difficult, hence my hybrid approach. I also made the top and bottom and the bias binding all out of the same busy fabric so that any wobbly stitching at the base would not be too obvious. I think that it will be good for my sewing tools when I take my machine somewhere just for a day – just the basics.
Eventually I did get around to trying a slide case for my colored pencils. When getting ready for a retreat in March I packed up the pattern and all of the materials needed to make the Stand Up Slide Down Pencil and Tool case by Caroline at SewCanShe.com. The construction was not difficult, but the case did not slide up and down very well even though I used the rip-stop nylon for a layer as suggested. As luck would have it, there was someone there that had already made one of these cases. She added an extra line of stitching that would help the inside lining slide down. That helped a bit, but I still need to convince the lining to move out of the way when I open the pouch. Here it is openand closed.
Also, I realized that I did not really need it quite that tall for my pencils, so perhaps sometime I will make one again and figure out which part does not need to be as tall.
And there you have it, three more containers to add to my collection.
I belong to two quilt guilds, a modern guild and a traditional one. They each offer different things. Recently the traditional guild asked me to speak about my quilting. There are so many accomplished quilters in the guild that I wondered why I was asked and program chair said something about how social media has had an impact on my practice. So, I turned my talk into a blog post. Here goes….
As a kid I learned to sew from my mom. She was a fabulous seamstress… not just dresses for us, but think of coats and evening gowns. Although she could knit and crochet, she didn’t much. I guess living in South Texas didn’t lend itself to knitting in wool. But she had this little Coats and Clark pamphlet with great drawings and I taught myself to knit and crochet and that launched my knitting career with my first sweater being a fisherman knit.
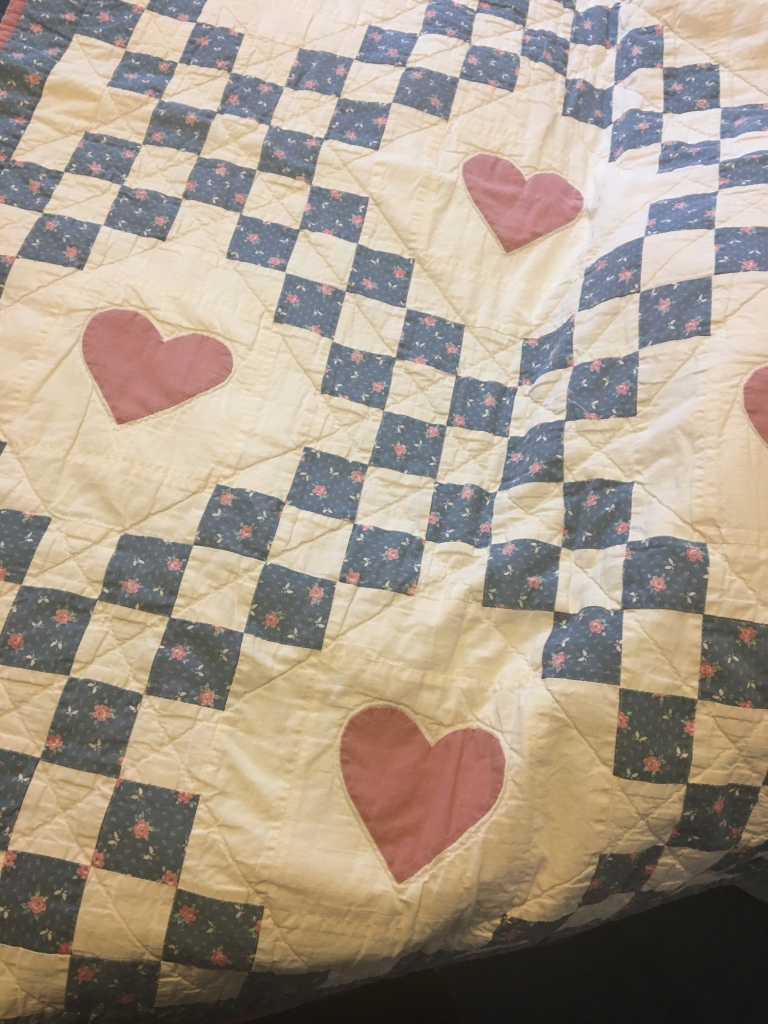
One summer while home from college, mucking around the basement with my mom we came upon an old quilt of hers that her mom had made. It was a Sunbonnet Sue and the top was separated from the wool batting that needed to be carded before it was sandwiched again and requilted.
I made a pattern from the block and that started my first quilt with the Sue fabrics coming from scraps from garments and curtains that had been made by my mom, sister and I. This quilt took its time being born as it was appliqued when I was in college, the blocks pieced together sometime in grad school and then hand quilted and bound during my first and second teaching positions. All fabric either cut with scissors or ripped on grain. Do you remember pulling a thread so that you could rip or cut straight on grain?
Fast forward 20 years or so. Life changed, I was working full time, became a mother and I made the occasional baby quilt, but not much more until I moved back to MoCo. This baby quilt was for a special someone. Can you tell it was 80s colors?
And then Capital Quilts opened near me.
They had a Saturday Sampler program, once a month, pay a buck or two, sit for an hour hearing about block construction, and you got the fabric and pattern to make the block and bring it back next month. I learned a lot from them… about pressing seams, precision in cutting and sewing. Next thing I knew, I wanted more… to have sewing buddies…
So I promised myself that once my daughter went off to college I would join a guild. I was working full time and so I couldn’t join Needlechasers or Nimble Fingers. I found Friendship Star and went to one meeting, but it was at night and too late and too many people. And that is when I found it…the internet! Of course I knew about the internet before, but I found the quilters, on blogs.
School wanted teachers to learn about this new resource and what better way to teach about blogs than to guide us through setting up and running our own blog and that is how this blog was born. Tink is knit backwards and since I was known for unknitting, that’s how I came up with the name. And I found the modern quilters, solids and bright colors, monochromatic prints! And the most amazing thing was that people would design quilts and then offer up their patterns for free and do a sew-along! Around this time I found a group of modern quilters that occasionally met in DC, and on a weekend, perfect for me! And this thing called flickr, a photo sharing site. Between blogs and flickr a whole new world opened up.
Quiltalongs
My first Quiltalong was the paint box quilt, made in 2010, the pattern by Elizabeth Hartman at Oh Fransonn! You might know of Elizabeth Hartman from her current pieced animal quilts, but this is how she began. This started my fondness of solids. This quilt was made primarily from a jelly roll of Kaffe Fasset prints and a Kona solids jelly roll and was probably the first time that I had ordered fabrics online.
I followed her instructions for the back of the quilt also. It was very clever how bits from the front were used for the back. Once this quilt was submitted for a show and they wanted to display the back, not the front!
It also was the first time that I thought of the back of a quilt as an opportunity rather than a necessity.
My second quilt along, the Supernova in 2011, was with Lee Heinrich of Freshly Pieced.
Bees
On flickr I was intrigued by bees. You make blocks for other people and they make blocks for you. Simple, right?
My first bee was the red and aqua bee. I wasn’t so sure that I loved red and aqua, but it turns out I do.
The Piece Bee with You Bee in 2012 was probably the smoothest bee that I have been in and the one that I learned the most from. There were 12 of us and each month one person got to ask for a paper pieced block of a certain theme. Geographically we ranged from mainland US, Hawaii, Australia and the UK. Here are some of my favorite blocks that I made for it. One person asked for something of mid-century modern design. That made me think of things from when I grew up and my mom had this big coffee urn that is classic mid-century design. Yes, I know it is a bit wonky. This is before there were so many paper pieced patterns available online. My ability to design a paper pieced block did get better.
One of my fav blocks from this be when someone wanted to make a comfort quilt for when one of her kids was sick. I asked my daughter what she would want and she said the remote, so there’s that.
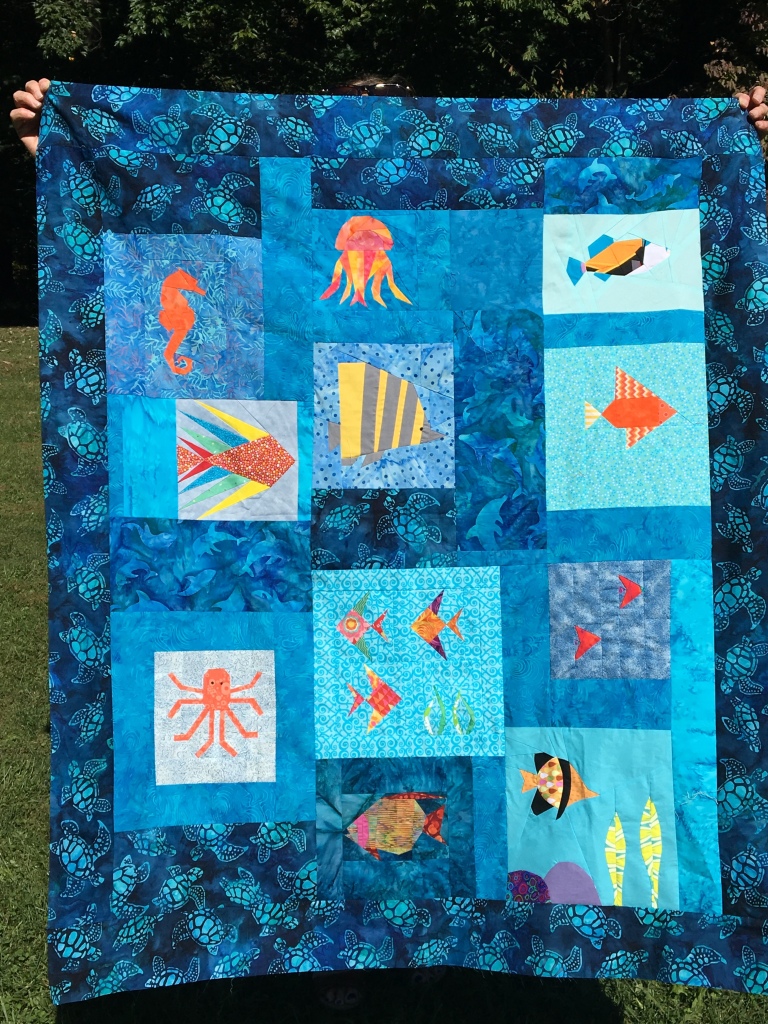
And I asked for sea creatures. Here is my Under the Sea quilt which is waiting to be quilted.
Many bees are for a few months or up to a year, but the Quilt Around the World II bee was almost two years long. There were 24 of us, spread out in a circuit around the globe. You make your initial block and make your request of theme or colors and then send your block to the next person, who makes a block for you following your “rules” and then sends both blocks on to the next person. And so on. And so on.
I started with this block with the Tula Pink frog.
From my house it traveled up the east coast, flew over the Atlantic to the UK, stopped in Europe, jumped over to a few stops in Australia, over the Pacific to the west coast of the US and a few more hops on its way back to me. Here are the blocks that I received to coordinate with my frog block.
Some block requests were design and color palette dependent such as HSTs in golds. Others were about landmarks in your neighborhood and or state or national flower. I learned a bit about chooseing a good block or theme for bees as some work better than others.
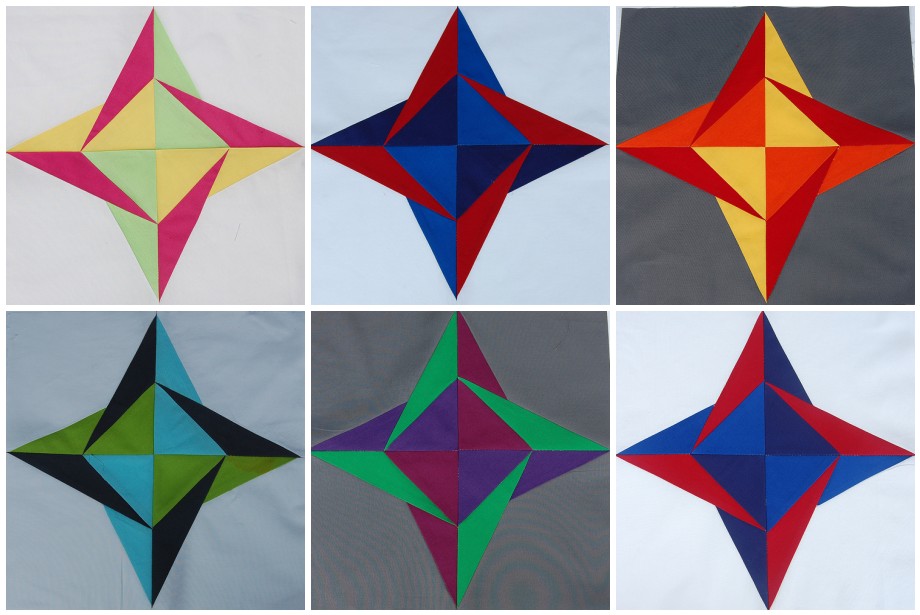
Bees can be another formats. In the 3 by 6 Bee members were divided into groups of 6 and within 3 months you make the same block but one each in the preferred colors of each of the members. I made my Serious block.
And, bees can be within a guild. For my red X plus quilt I sent out the red fabric for the center of the block.
Or it can be a charity bee. do.Good.Stitches is a set of charity bees world wide. It works like a regular bee but each circle makes quilts for a different cause. I am the leader of Serenity Circle and we make quilts that go to hospice patients and then to their families.
A note about skill level. My skills definitely improved over time. And people online in general are very helpful with tips and tricks, even opinions on color and what to do if, or pointing to resources. I think we raise each other up. The quality of some of the work out there is amazing.
Flickr was good for photo sharing, but when smart phones with good cameras were available, all of a sudden many of the quilters migrated over to Instagram. You could take a snap and ask a question and within minutes have comments. I resisted for a while, but finally joined in2014.
Swaps
Also online were swaps. Back in 2010 I participated in my first swap – the Pretty Little Pouch Swap. This was probably before Noodlehead came out with the open wide pouch, and I was pretty much winging it.
And this is what I received. I still love this pouch and I am still in touch with Nicki who made it for me.
Many swaps are blind swaps – I make for someone and a totally separate person makes for me. In this case, Jennie in the UK made me one of my favorite things, this fab sewing machine cover…
For the same swap I made this pillow cover for someone in Australia. This pillow cover had a lot of firsts for me… curved piecing, big stitch quilting, embroidery and inserting a zip in a pillow cover.
Did you know that sometimes even guilds swap? DC Modern organized a swap with Ottawa modern. This was a person to person swap. I made for Leslie and she made for me. Leslie was very involved with Canada’s 150th anniversary celebration and the logo for that celebration was a variation of the maple leaf.
What I received in return was so very personal… a mini quilt about a run that I wrote about on my blog. An early morning run on the Mall downtown.
Why join bees and swaps? It is fun – you have surprises – you make new friends – it makes you try something new and make something that you might not have made for yourself. Are there pitfalls? Of course. There are times that other people don’t follow through, called flaking or ghosting. Sometimes you are disappointed with what you receive. Overall, however I have gotten more good/great stuff than not. Some groups are better organized than others. Some are organized by skill level and the organizer needs to look at your feed before accepted. And some moderators keep a naughty list… you can guess what that is.
There are some things that I have given away that I really wished that I could keep, this woodpecker for instance that I made for the QuiltCon swap in 2019.
Do I swap as often nowadays, no, but I do like to be inspired by people and I do love challenge.
I like to push myself a bit, so I also test patterns for designers. You check for typos etc but also for clarity of instructions and other details. If I find fault with a pattern, I always wonder if it had been sufficiently tested by other sewists.
For this paper-pieced light bulb I suggested that the designer increased the amount of fabric suggested. I even showed her all of the little bits that I had left after starting with the suggested amount.
For the Chevin quilt I commented on how the instructions were written about makoing the curves. I like that it gave me an opportunity to use some of my large scale prints.
What started me testing was when I tested a technique for Sherri Lynn Wood when she was writing her book on improv quiting. The quilt that I made did not make it into her book, but it did make it into the Modern Quilt Guild exhibit at the Texas Quilt Museum. That was in 2016. Here is a pic from the Museum’s blog post. I bet you can tell which quilt is mine, as the other one is pretty clearly Maria Shell’s. Hey, my quilt was in very good company. If you don’t know Maria’s work, mine is the one on the bottom.
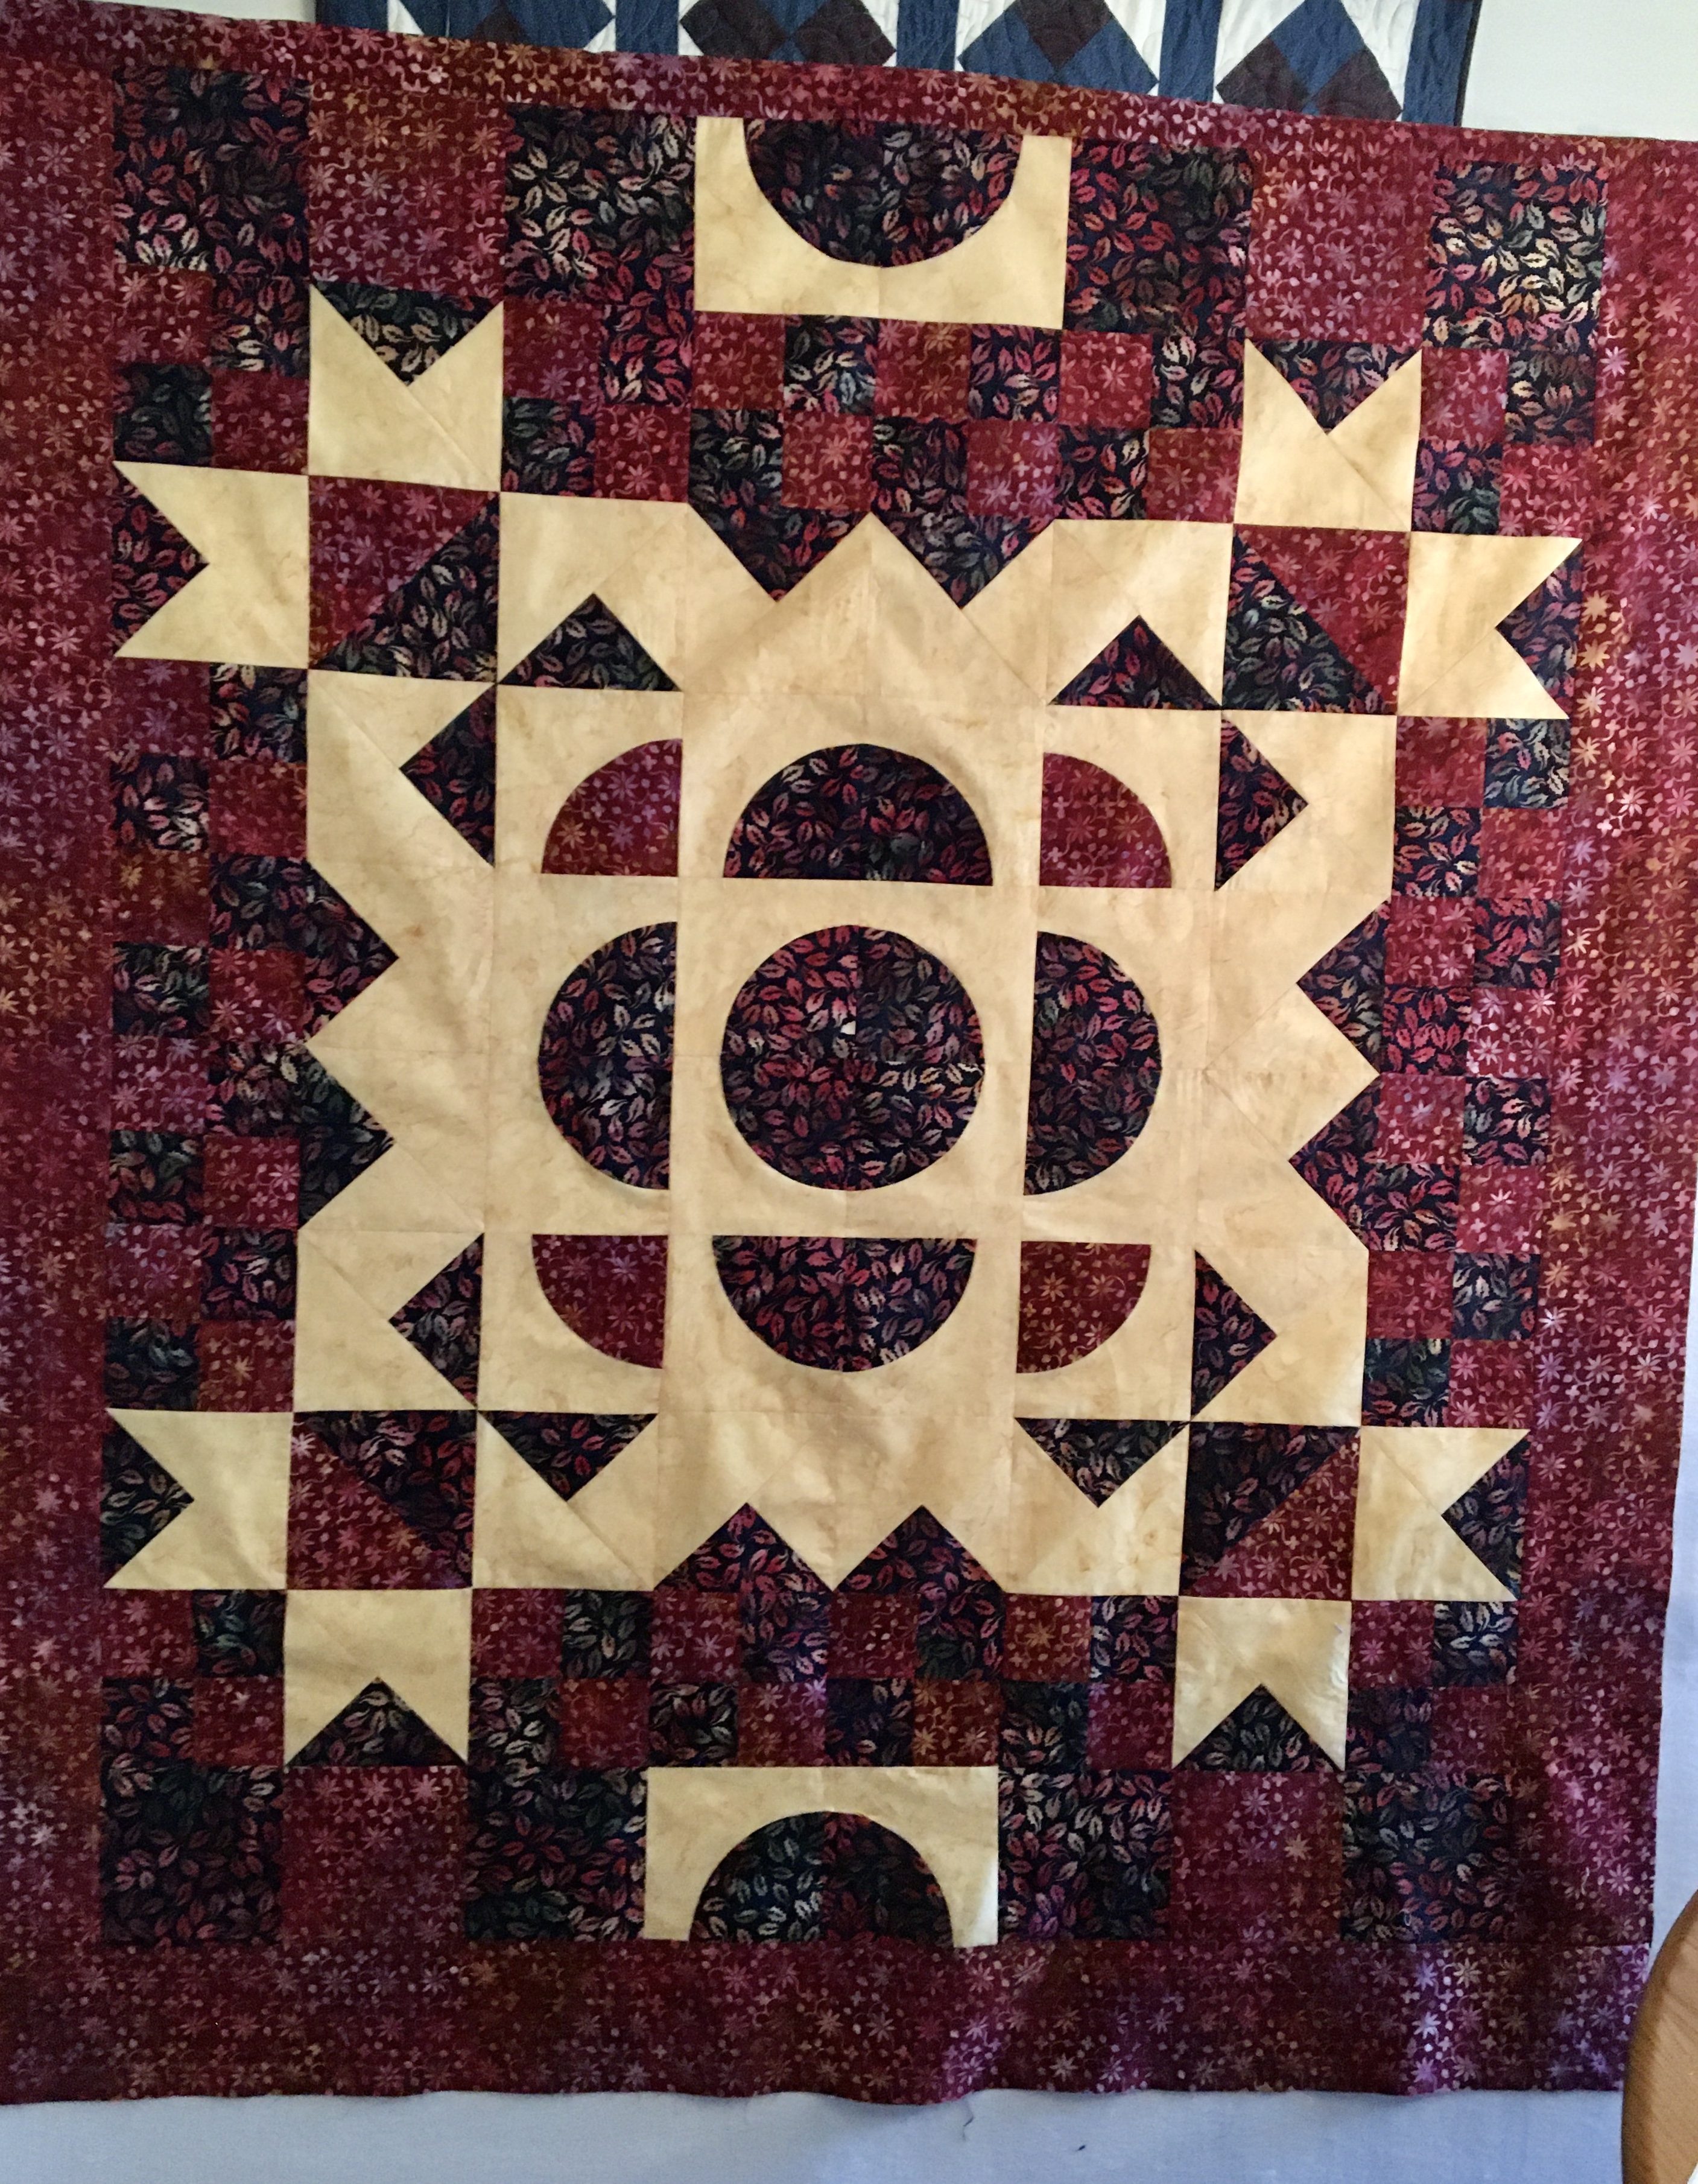
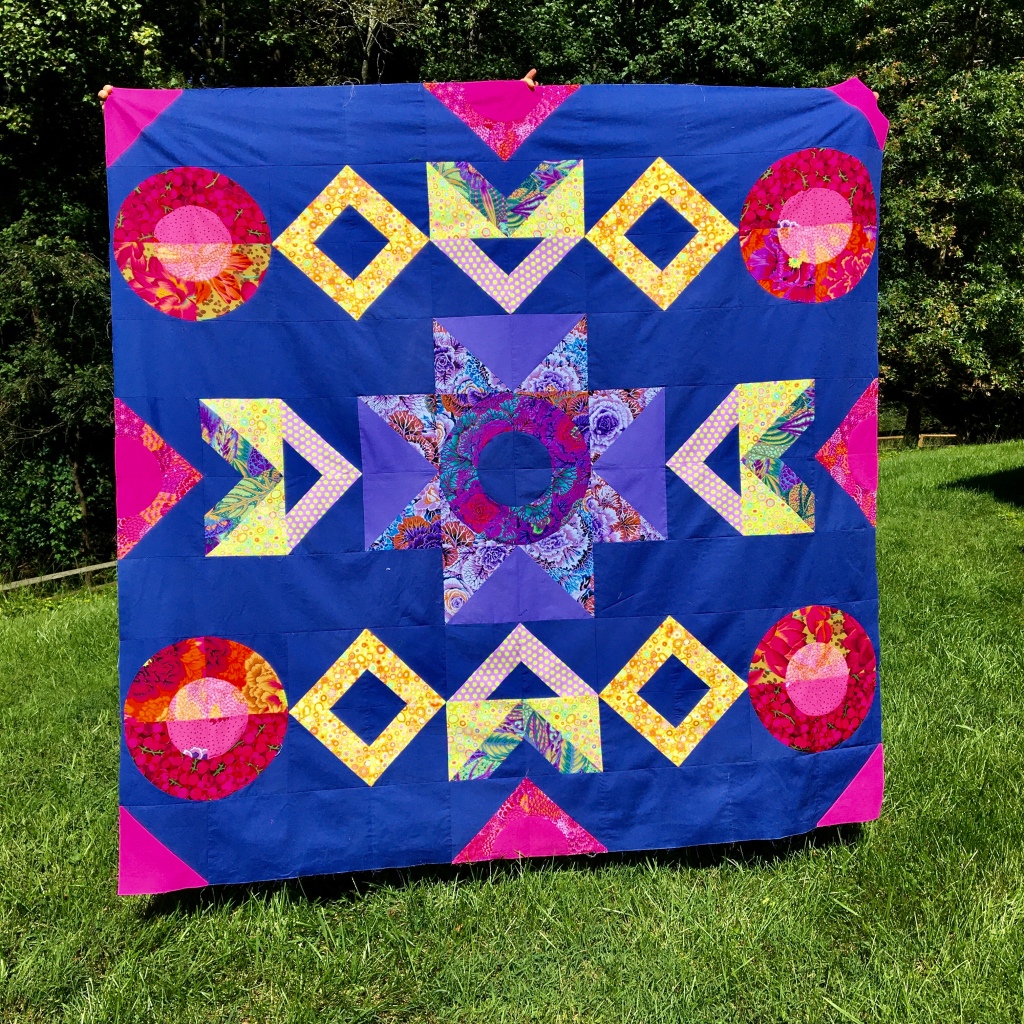
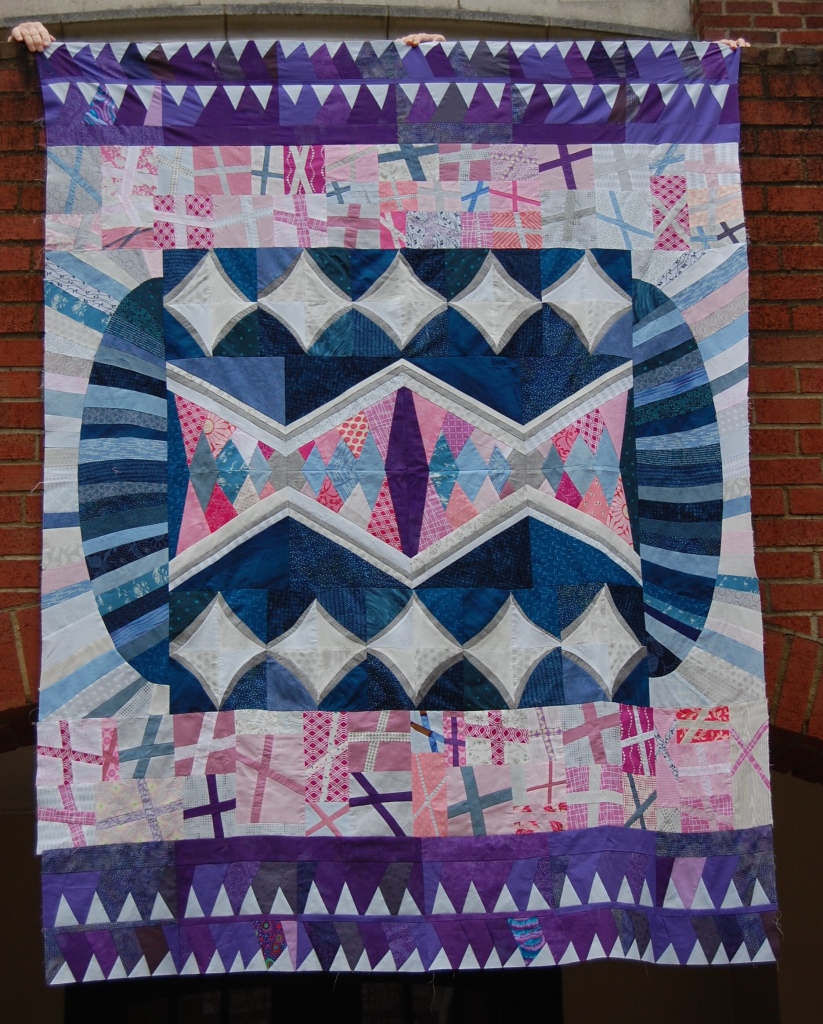
Ready for a new challenge, in 2018 I joined the Mighty Lucky Quilt Club run by Lucky Spool. It was a year long mystery quilt program in which 6 prominent quilters guided you through the quilt. You started by selecting a color palette. I used this Design Seeds photo for my color inspiration.
The quilt was blocked in different sections and I needed to decide which colors would be dominant in each section. I got out the colored pencils and tried a few variations, ultimately deciding to use the combo on the lower right.
And here is the final quilt top, waiting for me to be confident enough in my free motion quilting skills to not mess it up!
Last year Alison Glass ran a six month program centered on different types of hand stitching. Each month was based on a type of stitching and you received a beautiful digital journal about it and sample projects. I liked being able to see on Instagram the projects that others were making and draw inspiration from them. Here are. my six projects.
And finally… having that quilt in the TX Quilt Museum show made me think, maybe I could actually exhibit some of my quilts. So I entered some quilts in QuiltCon.
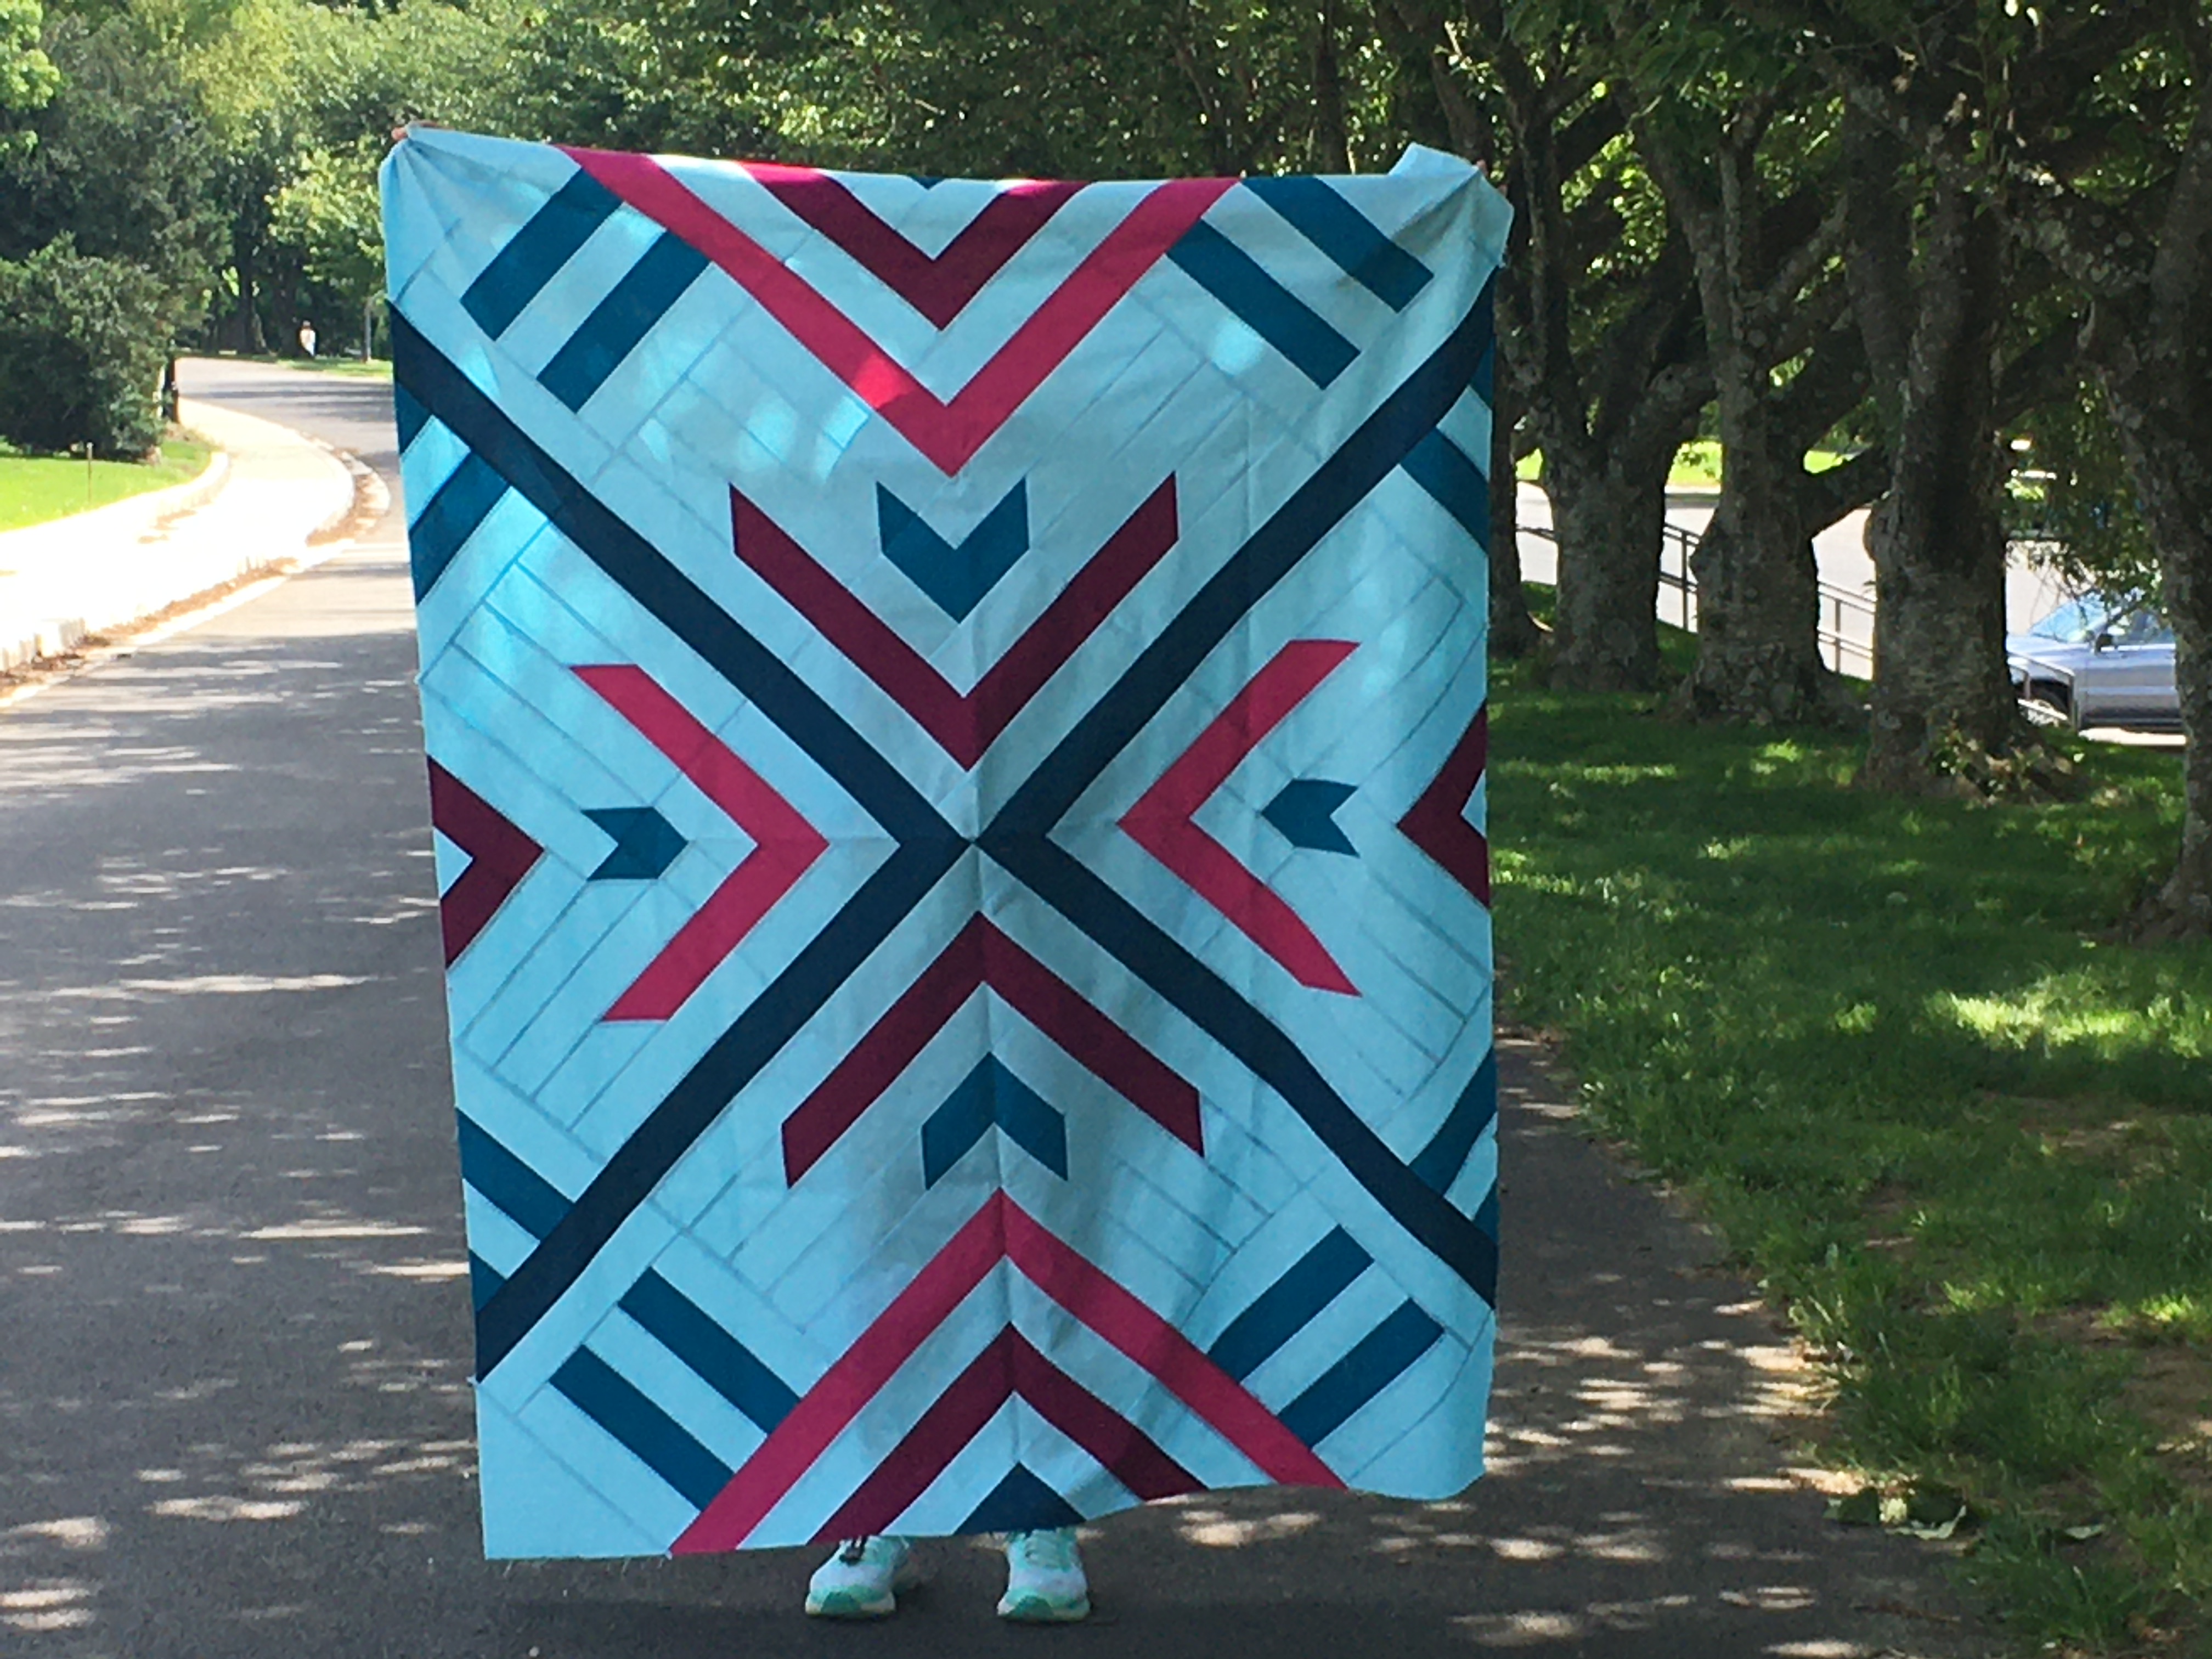
In 2019 MCM – I was playing really, but just in two colors
In 2020 Farewell to Fox Island. These are batiks were part of a fabric challenge.
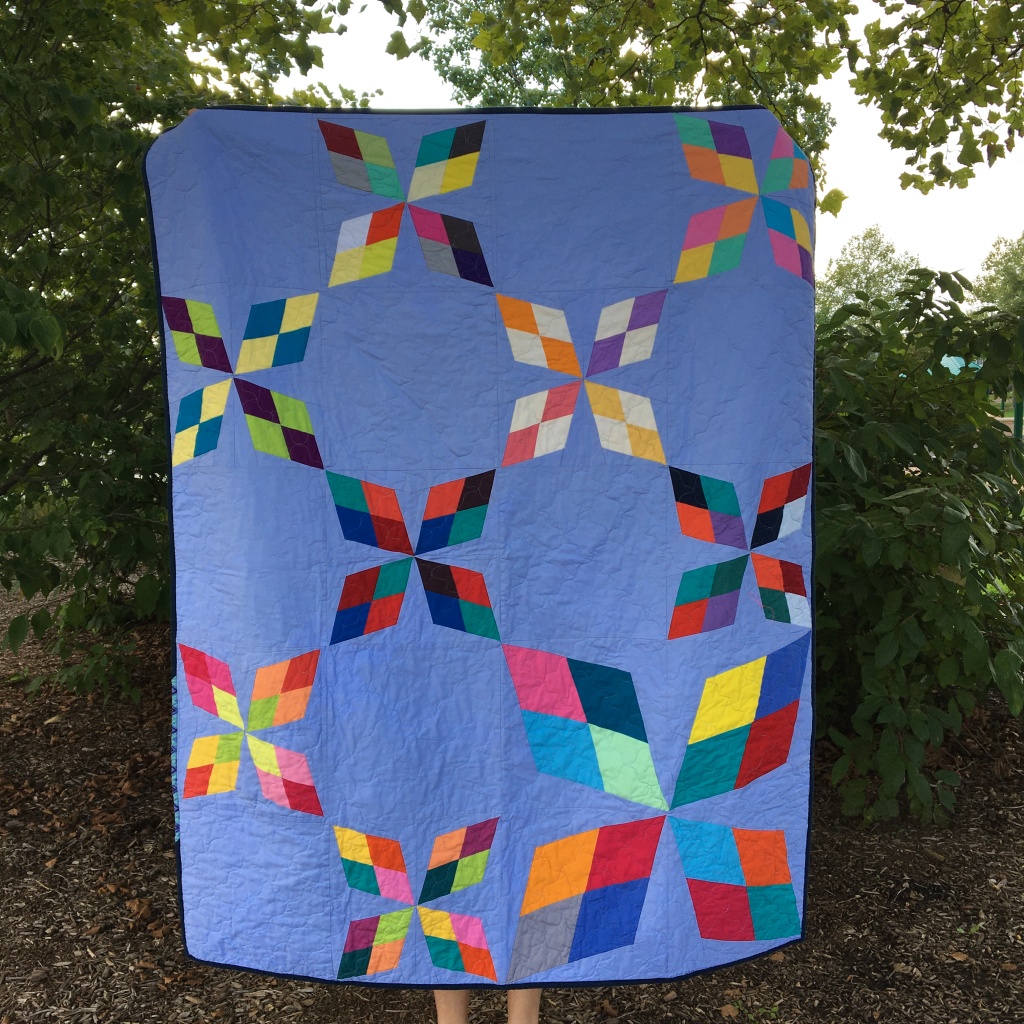
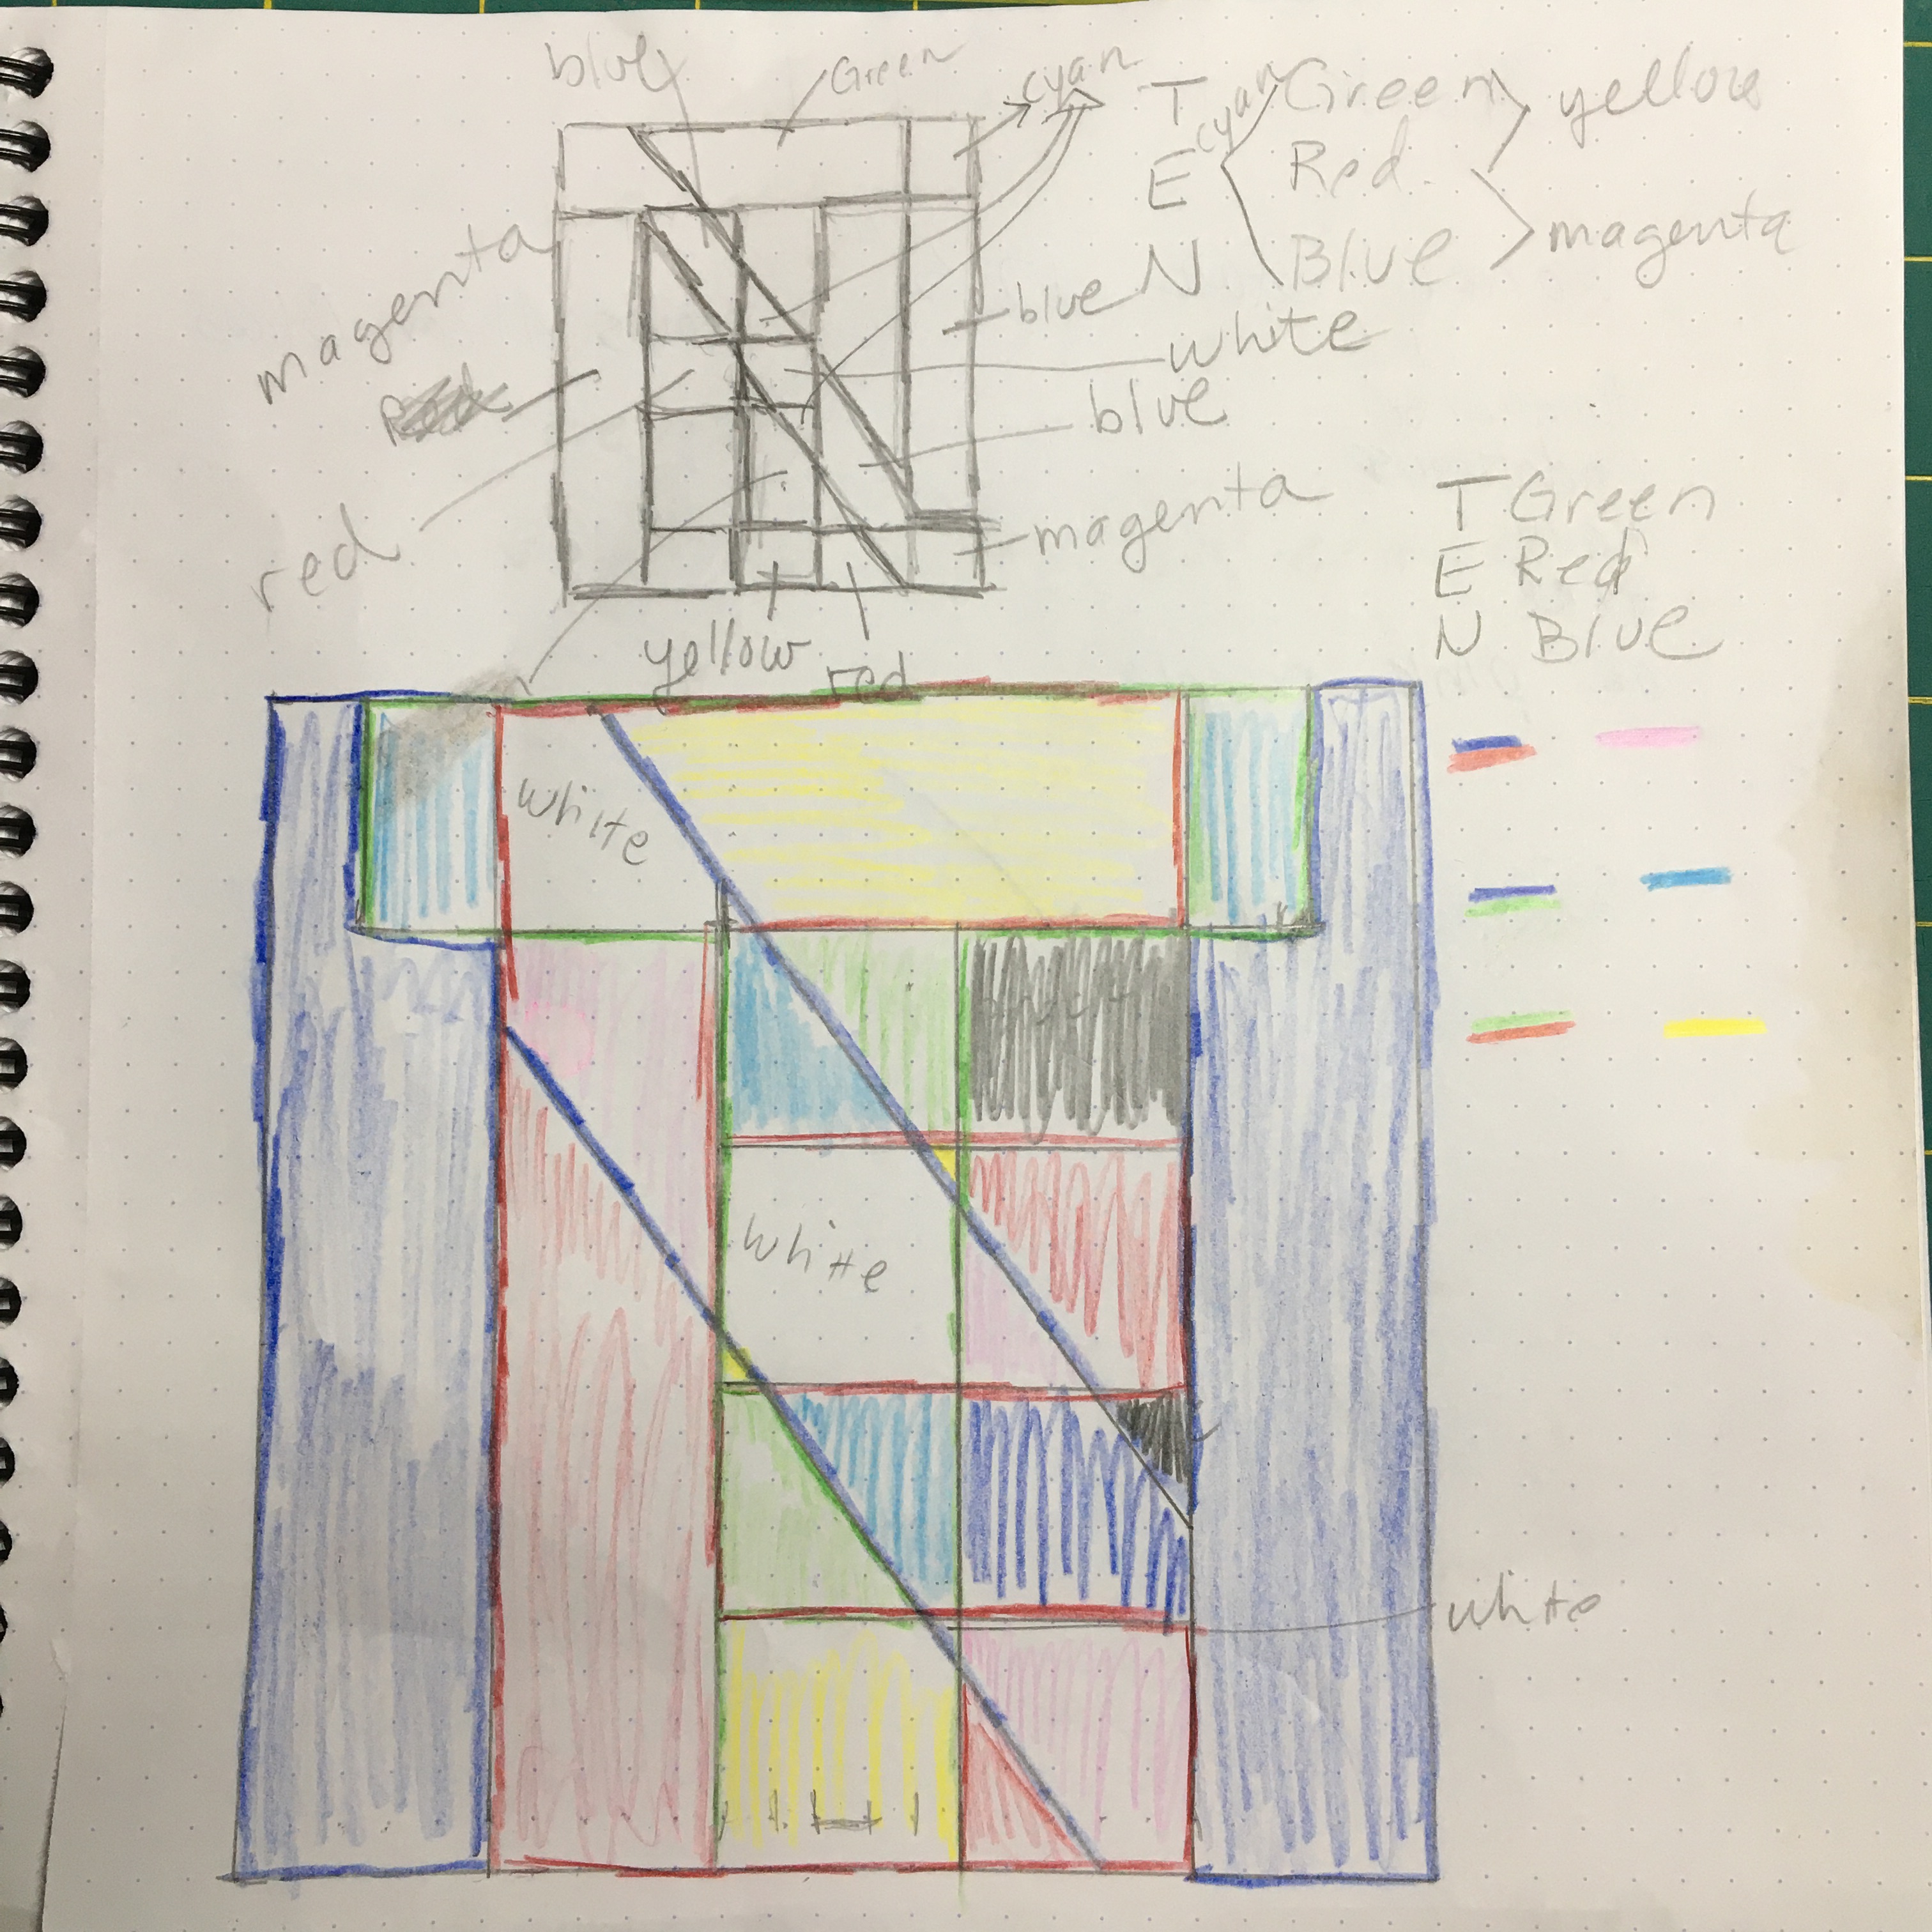
In 2021 – T E N To commemorate DCMQG’s tenth anniversary we had a challenge around the theme of 10. I played with the letters and originally was going to work with the concept of transparency, but as I worked/played, I recalled experimenting with overlapping colors of light and went in that direction.
So, why sew with other people and interact online? Because it is fun, you meet new people who aren’t just like yourself, you are exposed to new ideas, and improve your skills. Because you can.
A few years ago I participated in 100 Days project. It really is as simple as it sounds. Do something 100 days in a row. Draw, sew, sculpt, write a poem… you get the idea. My last project was to make HST every day. Essex linen background and 101 Kona charm squares. And, I did it. Have I sewn the HSTs together? Not yet, but I will, soon.
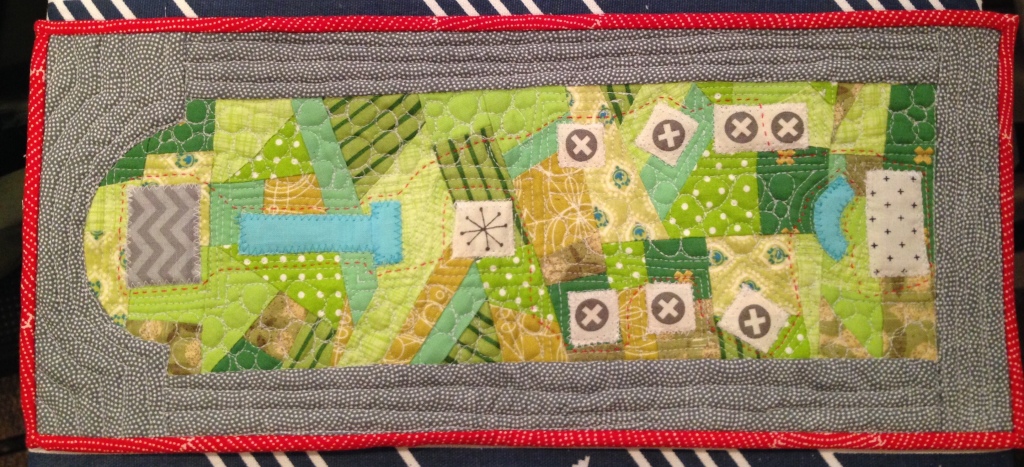
I have been mulling over doing it for this year. The next 100 days, I most certainly will be home. I also have been interested in temperature quilts for a while, and indeed the MQG had a webinar on it this past week. Don’t know what a temperature quilt is? Imagine making some sort of quilt block with colors representing the high and low temperatures for that day. It could be for the same location all year, or where you happen to be. You get to make the rules! There are thousands of them here on Instagram. If I started today and did my 100 days, chances are I could keep it up for the rest of the year. My thoughts ran to what fabric to use and I realized that I have this stack of 25 solid Art Gallery fat quarters that I see whenever I look at my stash. At first I thought of using flying geese on a roll that I have. But there were a few issues with it. I probably would need an additional roll if I was to do it for all year… plus since the geese would finish at 3″ by 6″ the quilt would wind up big and I really don’t need or want to make another big quilt right now. And then I thought about how much fabric I would need, and the uncertainty of how much of which colors. That all led me to the idea of doing this small scale, table runner size. I use runners on the kitchen table and the dining room table and often on a coffee table, so it certainly would be used.
Today is the official start of the project, so I got up this morning and started to make a spreadsheet. I love me a good spreadsheet! I first looked at the range of temps where I live to see if I could do one color for a three degree spread. I don’t know how low the temps will go this year, or how high, but down to the teens and up to 100 degrees F would not be a record breaker. That would use almost 30 colors, so I went to 4 degrees per color. I lined up my colors and assigned each temperature range a color.
I then cut out labels and pinned them onto the fabric.
And when I did that I noticed something that I had not noticed before. Art Gallery labels their solids on the selvage. Yay! I usually have to label them myself.
The free flying geese templates that I found online from A Quilter’s Cache don’t print out at what they said they would, no matter how I played with the printer settings, but as long as the templates are all the same, it doesn’t matter. So I started and collected the high and low temperatures from yesterday and and made my first flying geese block.
And so I am off and running with my 2021 100 Day Project. While setting up the spreadsheet I wondered if I ever would get a day when the high and low temps didn’t vary more than 4 degrees, and even within one category. Strangely enough, today might be that day. For the most part the temp varied between 29 and 31, all within the aero blue category, but checking more closely it dipped down to 28 briefly, eliminating the chance of a solid block, at least for today!
Another Block of the Month program? Well, yes. The MQG has lots of quilt blocks archived on their site. Each modern block has not only instructions to make the block, but lots of different ways that the block could be used. My guild draws on these blocks for a monthly block challenge. Last year I decided that I would make each month’s block into a charity quilt for Comfort Cases. If you are not familiar with them, then please check them out for the great work that they do supporting youth in foster care. It also doesn’t hurt that they are not far from me, so easy to drop off quilts. Actually, recently I became an impromptu collection point for guild members to bring their quilts and within a few days I had 51 quilts that I dropped off at Comfort Cases. Not bad, eh? Although there are floods in the South and wildfires in the West, unfortunately there will also always be kids entering foster care.
Sparrow by Heather Black of the Northwest MQG was the first block that I turned into a quilt. I quilted it using a wiggle stitch on my domestic machine.
Boomerang block by Mitzie Schafer of Greensville MQG was the basis of the next quilt.
One of my guild mates, Ann L, saw some of the tops that I had pieced and volunteered to longarm them for me. That was an enormous help to me and greatly sped up getting some of these quilts done so that they could be donated. I have close-ups of some of those tops.
Next up was Cogs by Yvonne Fuchs. Check out the quilting that Ann did on this one!
On to Mod Z by Lori Miller of Detroit Area MQG, also quilted by Ann.
This one is a sized up Crisscross Applesauce block by Rebecca Severt of Baltimore MQG. Quilted with diagonal lines with my trusty walking foot for the win!
And one more that is not from the block study group, but that went to Comfort Cases as well. This is a block called Arkansas Traveller from the very first Summer Sampler Series hosted by Katie Blakesley, Faith Jones and Lee Heinrich. I made the full quilt and then used the free pattern for a solids only bee one summer – note that it is not a great bee block as it required folks to print it out the proper size and then is a bit trickier than most bee blocks. I made a giant block to round this out and quilted with wiggly lines.
I have six or so more blocks that need to be made into quilts. They sit in my sewing area and surface very sew often. Stay tuned!
DCMQG is ten years old this year and the guild challenged us to make mini-quilts that represent 10 in some way. For some time I have been intrigued by the idea of transparency and layering of colors. My concept of 10 would use the letters, T, E and N. I started with my sketch book and played around putting one letter on top of the other.
In my work life, I taught middle school science for many, many years and one of my favorite topics to teach was light, more specifically playing with colors of light and how mixing light is different from mixing colors of paint. I had this little sample pack of theater lighting gels that I used show students about different colors of light and the absorption and transmission of light through the gel. When I started to play with those gels to see how they could help me develop some strategies for selecting colors for transparency, it made me think about something else.
A little background on light … skip onward if you are familiar with this. Sunlight (known as white light) is the combination of all colors of light. If you see sunlight going through a prism the light is split into a rainbow, those colors commonly called ROYGBIV. Now suppose instead of splitting white light, you wanted to create it by mixing separate colors of light. Red, green and blue are the primary colors of light. If you mix green and red light you get yellow light, red and blue gives magenta light, and blue and green gives cyan. Thus, yellow, magenta , and cyan are the secondary colors produced by mixing pairs of primary colors. This is the same concept as mixing colors of pigment, but the outcomes are different.
So, now imagine a green T, red E and blue N superimposed on each other. Places where the green T overlap the red E will be yellow, but places where the green T overlaps the blue N will be cyan. Places where all three letters overlap will be white since red, blue and green light combine to form white light. There are a few places in my sketch that are not filled with any letter, so that would be without light, or black.
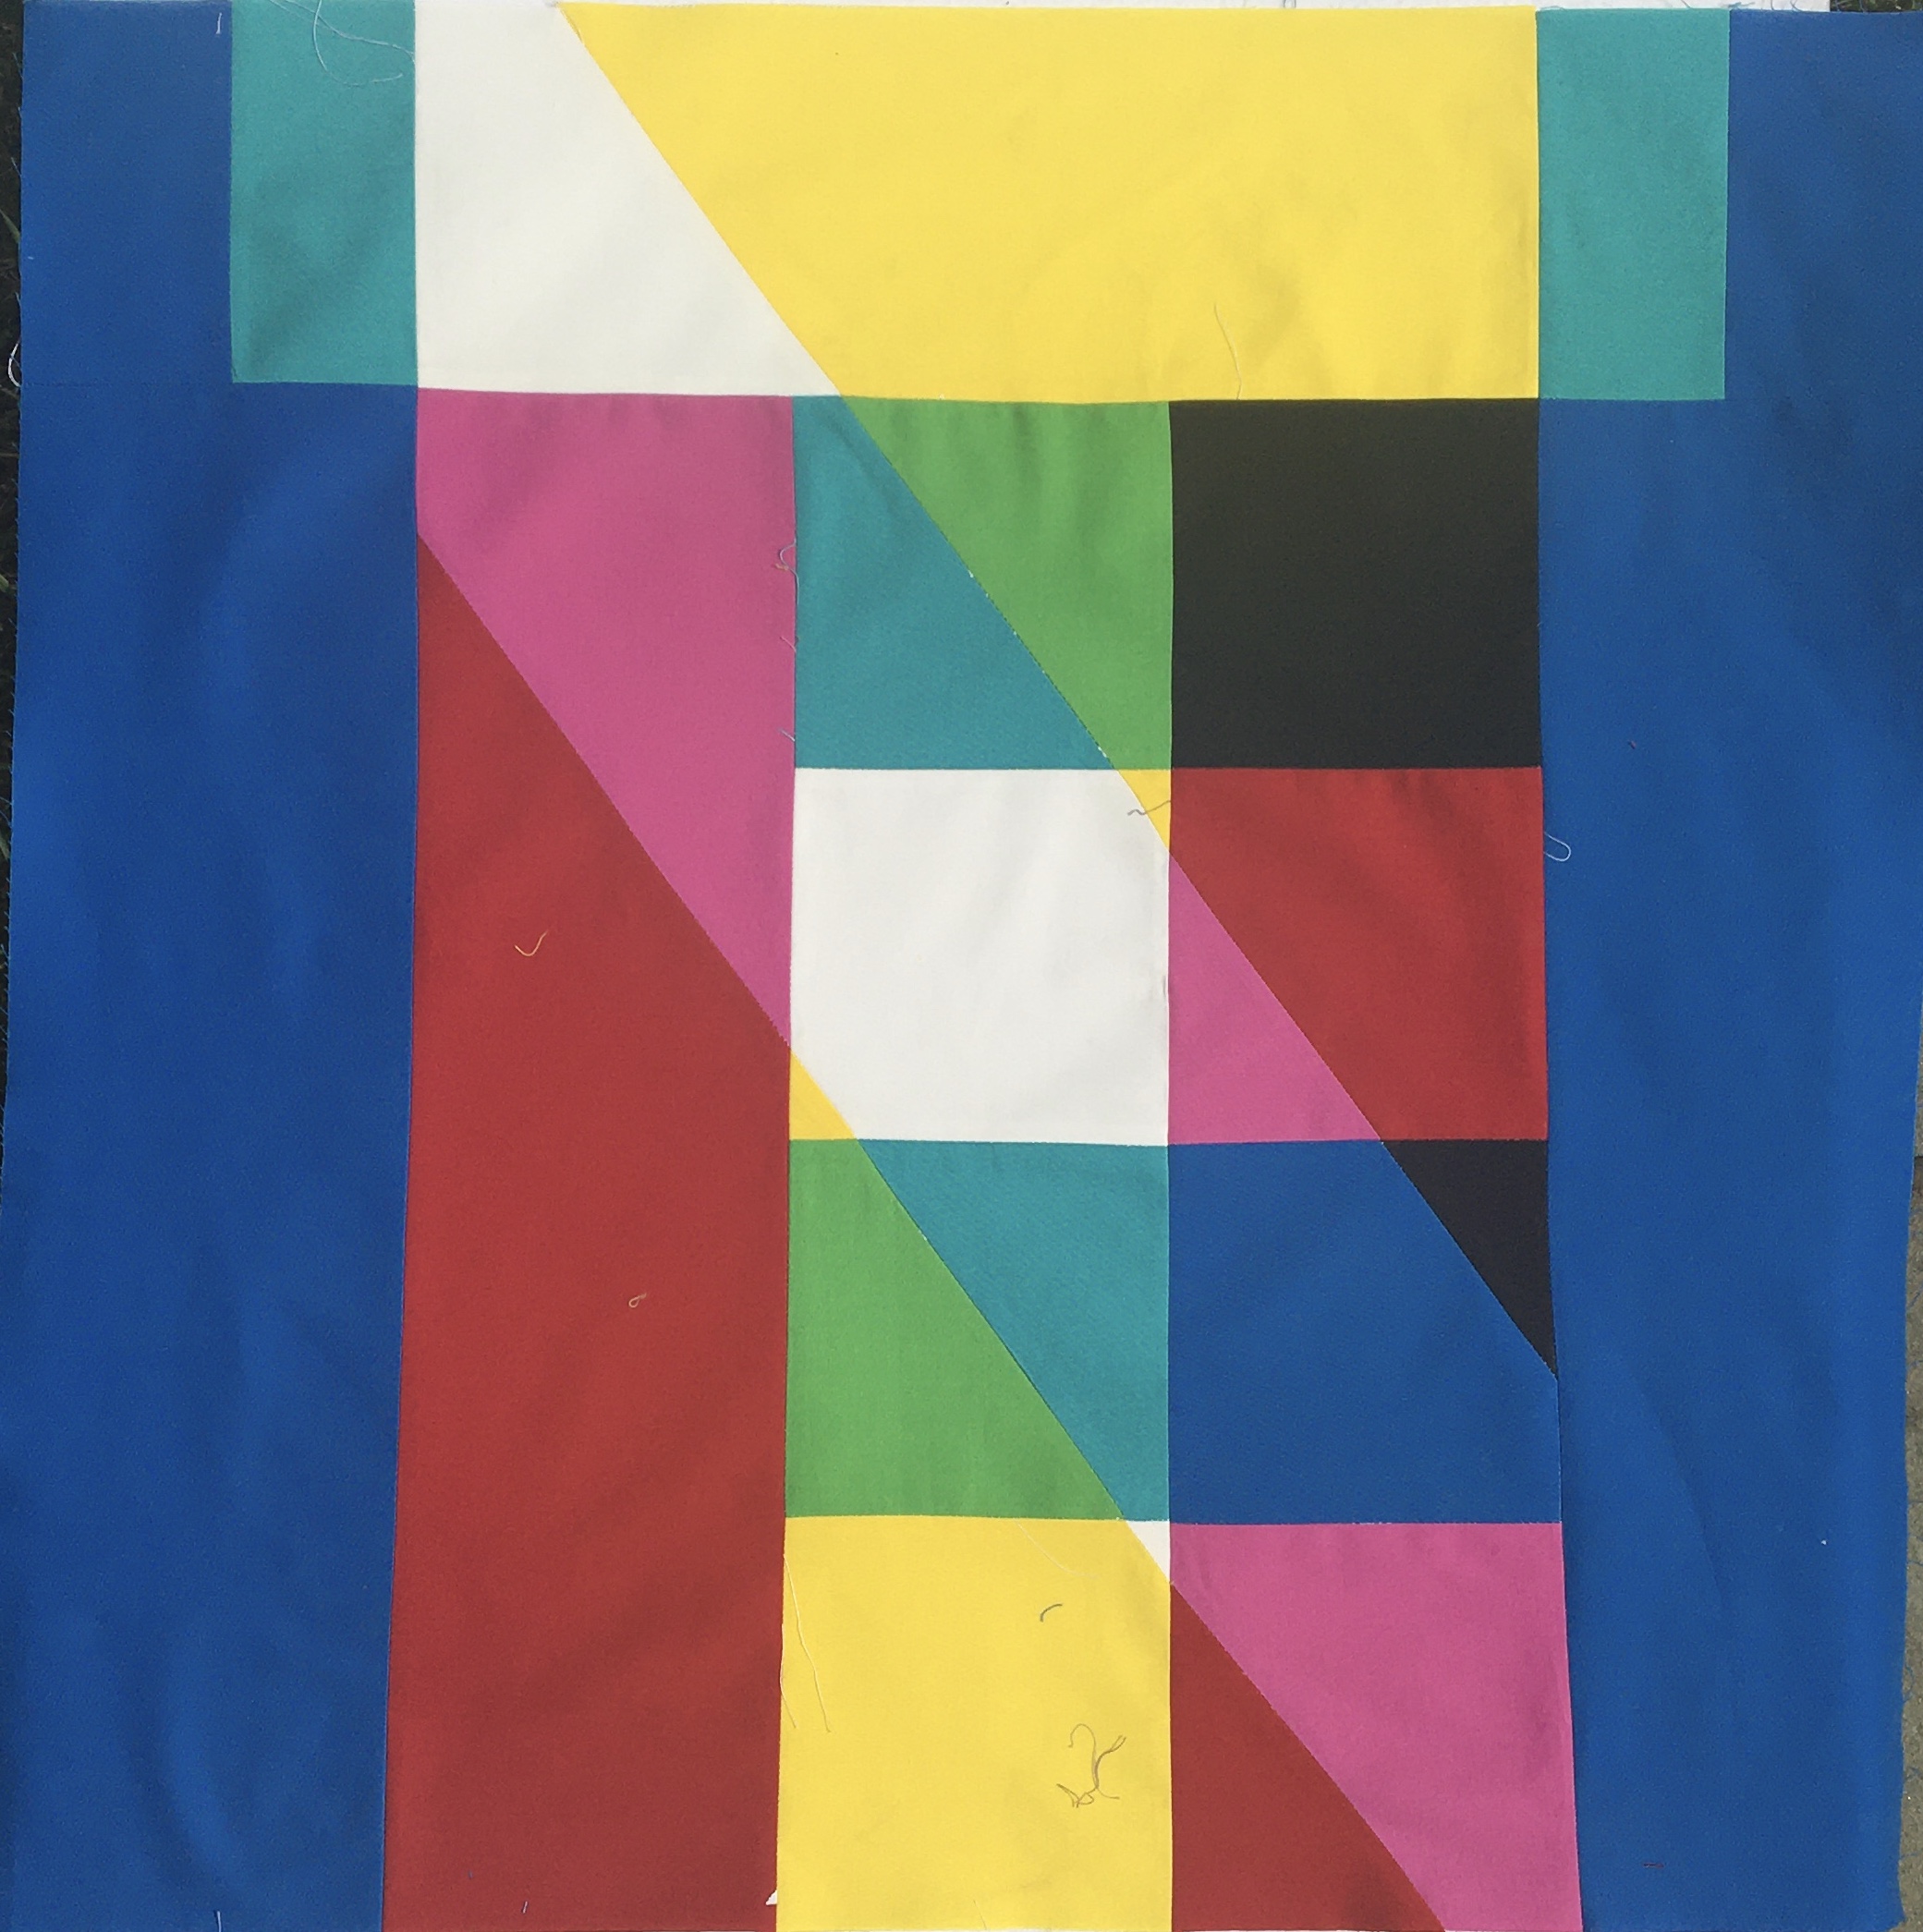
I colored my sketch to help me figure out color placement then drew a grid on freezer paper to scale up my design and make templates and constructed the top.
Next up was to check my work by taking pictures through green, red and blue filters. If all was as I expected the T should show up when looked at through the green filter as only green light will come through. Remember, yellow and cyan also have green light in them. The same principle applies to the red E and blue N.
Onward to quilting. I used clear monofilament as I did not want anything to interfere with the color values.
And then I again photographed the quilt through green, red and blue filters.
I might not have use the exact same filters, but the overall effect is the same. Now that I found that concept to work, I want to go back to my original idea of using the gels to play with transparency. Stay tuned!
Wow, my last post was early February. Who knew what was coming down the pike? Probably various health officials around the world, but definitely not me. So let’s catch up, shall we? My first three quilts were well on their way by the start of March. Plaidish was completed, the top for Vintage Lace done as was the Go quilt. The last two I sent out to different long arm quilters and I just got them back, but have not bound them yet.
March – lots going on but no leaving home. Fortunately I have a significant stash to keep me occupied. While digging in my stash one morning I found a collection of fabric stuffed in a bag. Long ago (2005 perhaps?) I took a mystery quilt class by @marklipinski at the Quilters Unlimited show. It was a full day class for which you did all of the cutting out ahead of time. The morning was great and I got all of these blocks done. Then, the phone call came – yes it was a long time ago but I did have a cell phone. A family emergency. Long story short, I spent so much time on the phone trying to sort things out that I eventually just packed up and left and went home and then to the airport. Things eventually turned out ok, but flying out was the right thing to do. I guess I just shoved all of the pieces in the bag and it was set aside and it worked its way deeper and deeper into the stash. A few HST units and some quarter triangle blocks and I could put it together and one more WIP would be on its way to completion. Easy to do, it is now quilted and bound waiting for a label and for me to hide all of those threads!
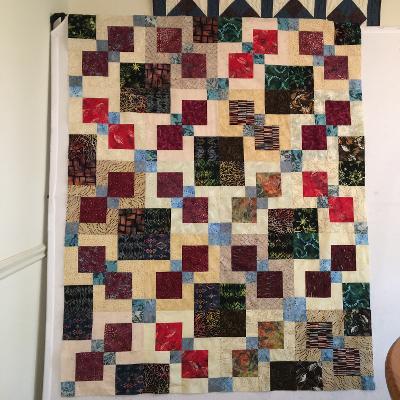
I also found in my stash a stack of 10 inch batik squares. My husband was given them by one of his sisters when he was visiting them. I presumed that they really were for me to make something out of, so I found an easy pattern that I could use for them – the disappearing nine-patch. I made one from the stack of squares….
And then by adding just a bit of other background and supplementing the reds (stash shopping from guild friends) I was able to make another quilt. Both are now quilted and mostly bound, but waiting for labels before being finished and ready for their glamour shots.
I also had this collection of charm packs – six of them – and some coordinating solids and worked them up into this double quilt.
This one is actually a little too big for my design wall and is a bit big for me to happily quilt myself, so it is now off to the long-armer.
Once the pandemic was fully underway, I signed up for two sew-alongs that I knew that I could sew from stash. The Homecoming Quilt is designed by Lo and Behold Stitchery
I really liked how this went together and might make another one day. I already have the back, so hopefully it will get quilted in the next spurt.
And, finally, there is the Atmosphere Quilt by Lee Heinrich of Freshly Pieced. Lots of small flying geese and half-square triangles. This one is waiting for a back and then to be quilted.
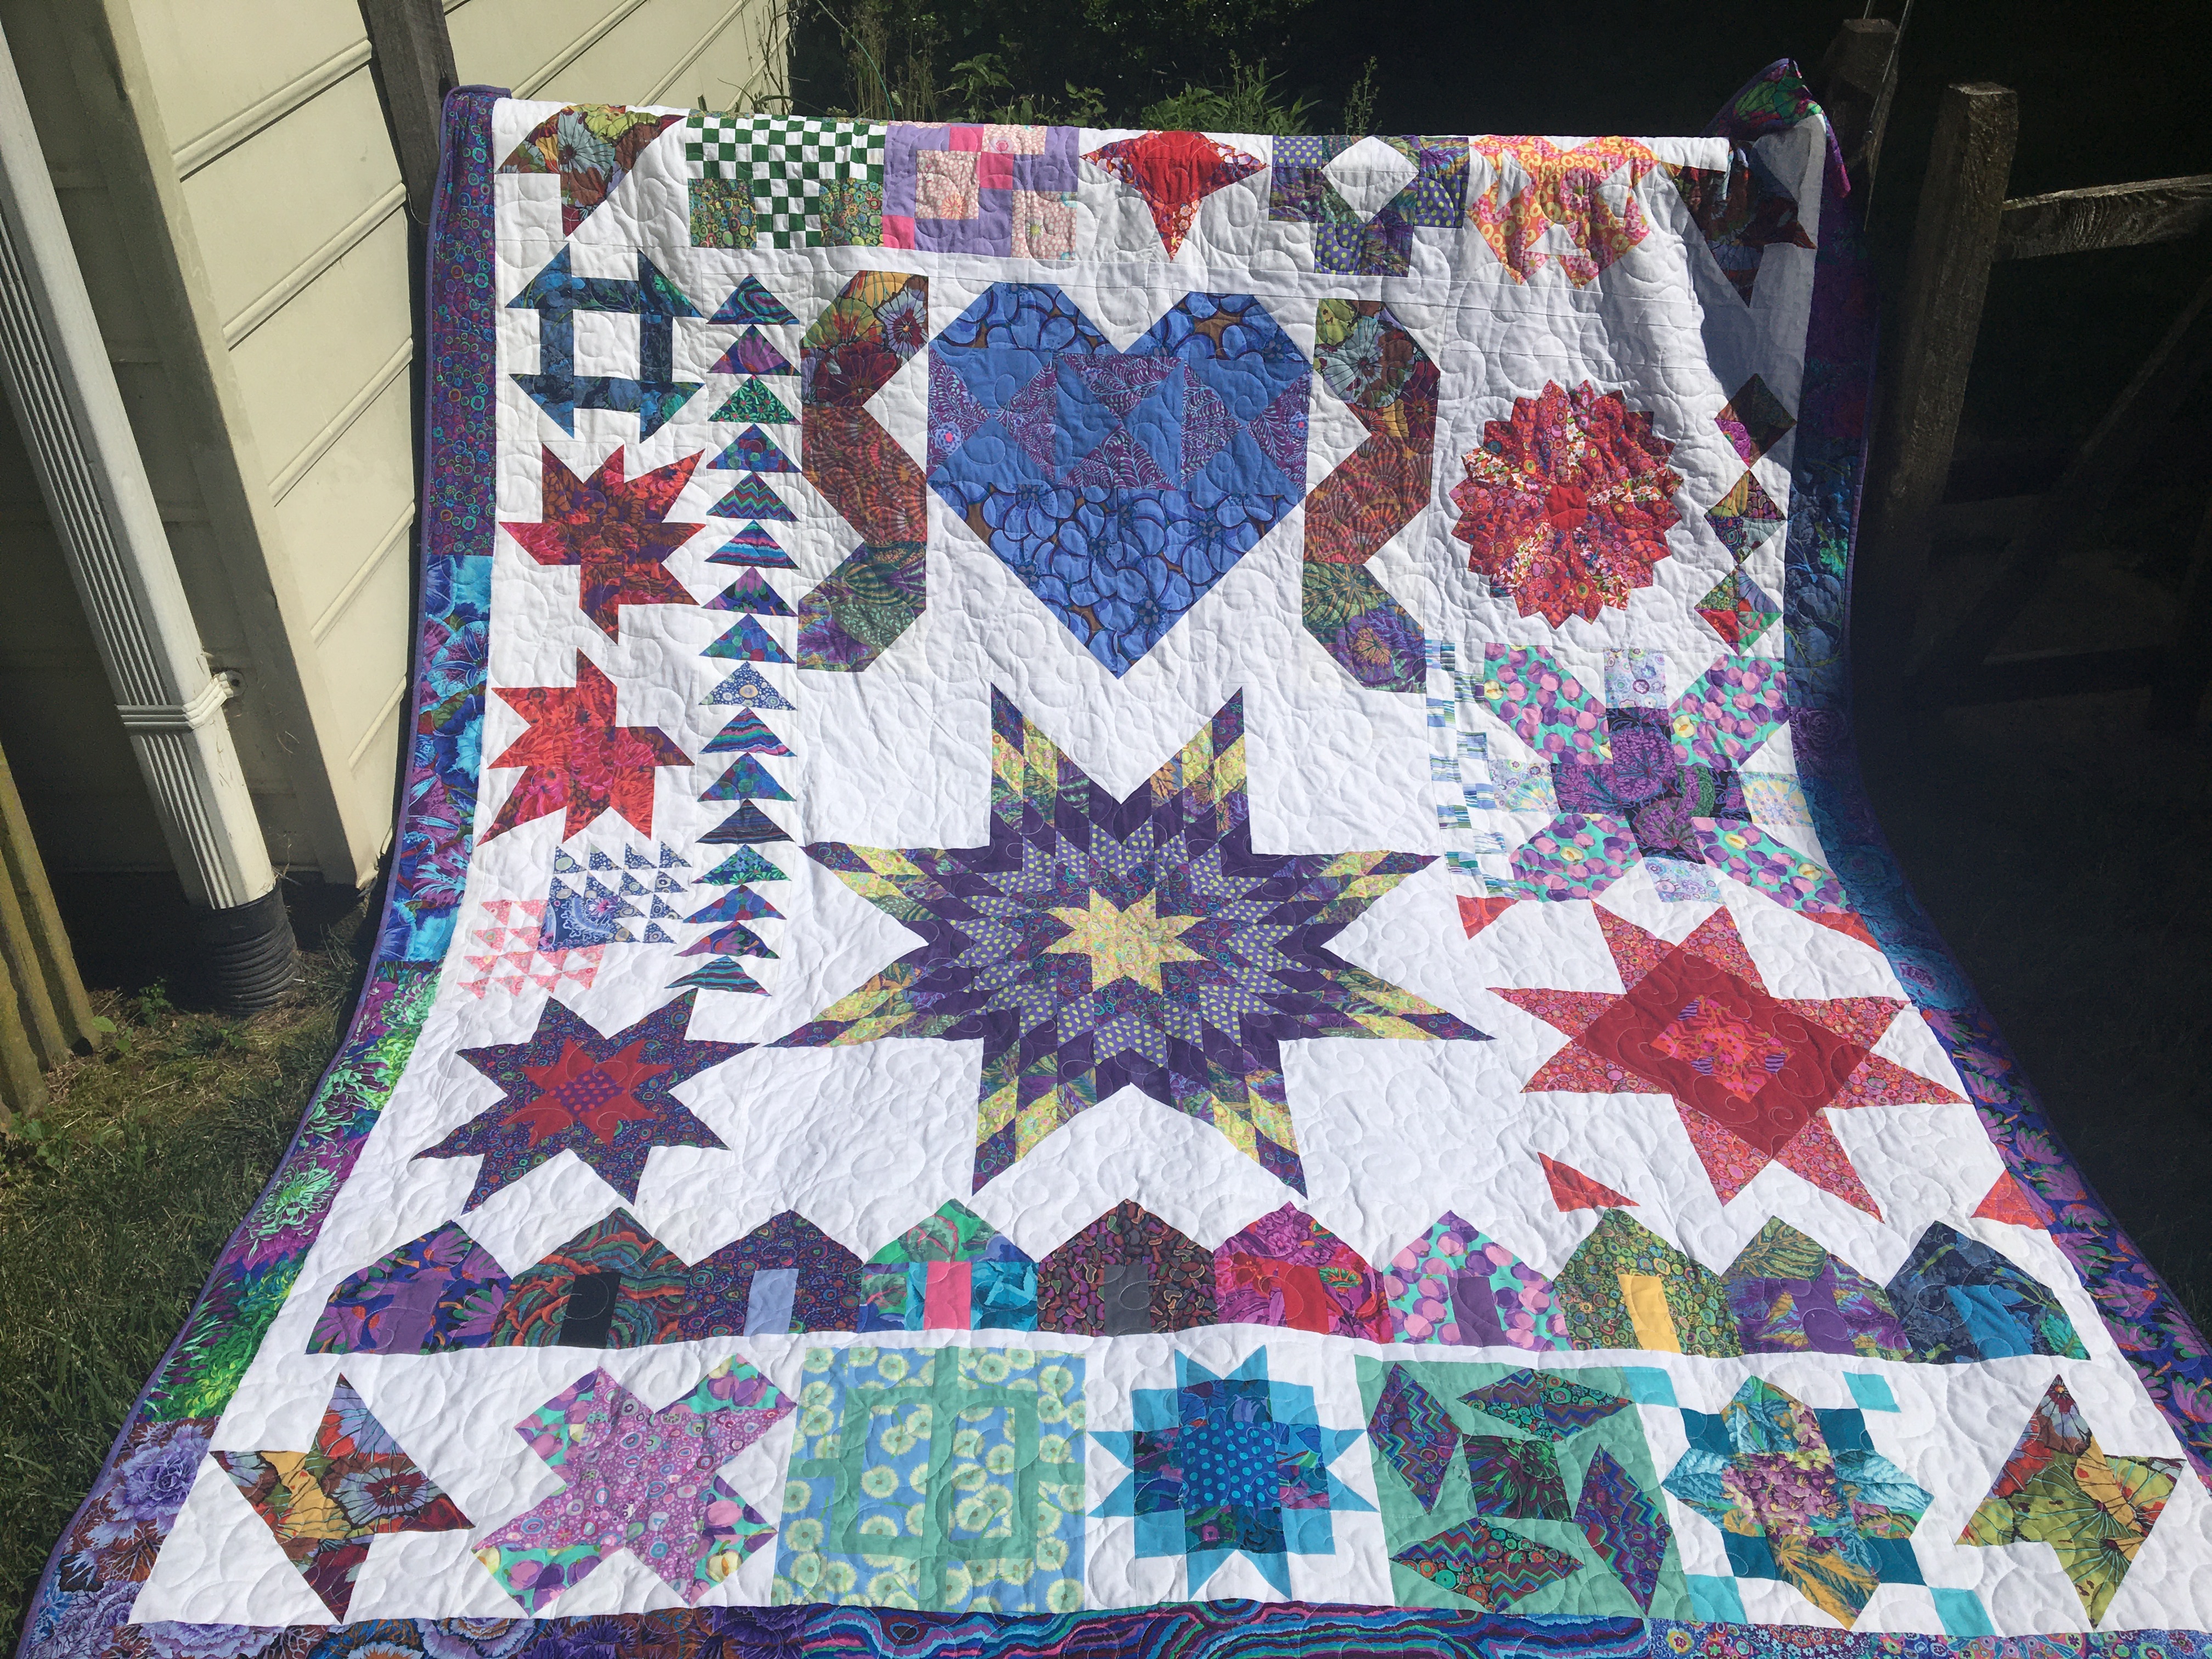
And finally, I was able to bind my DCMQG Sampler quilt, so I will include that in my tally also.
So, I have never quite figured out if it is sew-along or sewalong. Same thing for the quiltalongs and the finishalong – and I am one of the hosts of the FAL! I never remember which form I am supposed to use. Oh well, no matter. It has been a resonably productive week.
Plaidish Quilt
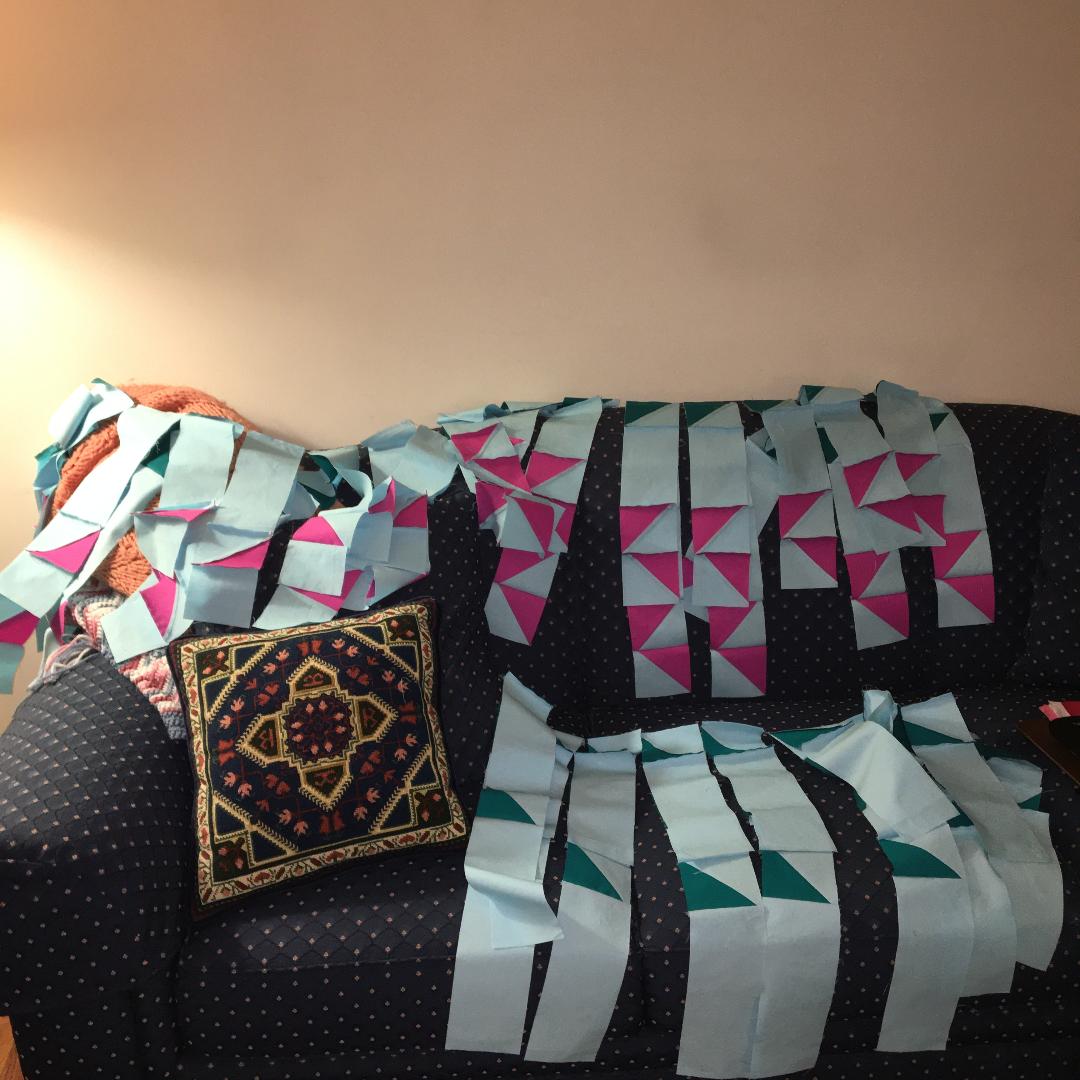
This one is not an official quiltalong but one some of my guildmates decided to creat. The Plaidish quilt is a great scrap buster by Erica Taylor Jackman @kitchentablequilting A friend came over to sew one day last week, and I decided that these blocks that had the components all cut out were the perfect thing to sew. I could more easily do random combinations – I have trouble doing random and tend to over think things, so with the two of us sitting and sewing at the kitchen table it was perfect and I made the light blocks. I started seeing more pictures of Plaidish quilts and that made me want to get going, so yesterday I worked on the medium blocks. I just got them up on the design wall, and they don’t all fit, but enough to let me see them and get organized to sew them together.
Vintage Lace QAL
This week was week 4 of Vintage Lace Quilt-Along by Brittany Lloyd of @loandbeholdstitchery and we were supposed to trim the HSTs, but I had already done that so I pluged onward to start to put the rows together. The quilt is made of eight repeats of a half-medallion unit which is 6 rows big…got that? I think I had a picture of it a few posts ago. I decided to chain piece each row so I made stacks of 8 of each component that I needed for the top row. and then started chain piecing 8 units of what I needed. When done I had these pretty things. For these combinations, so far there were only a few combo where the points had to meet, so it didn’t take me too long to put together 4 of the 6 rows. Now they are in this pretty chain thing draped around the room.
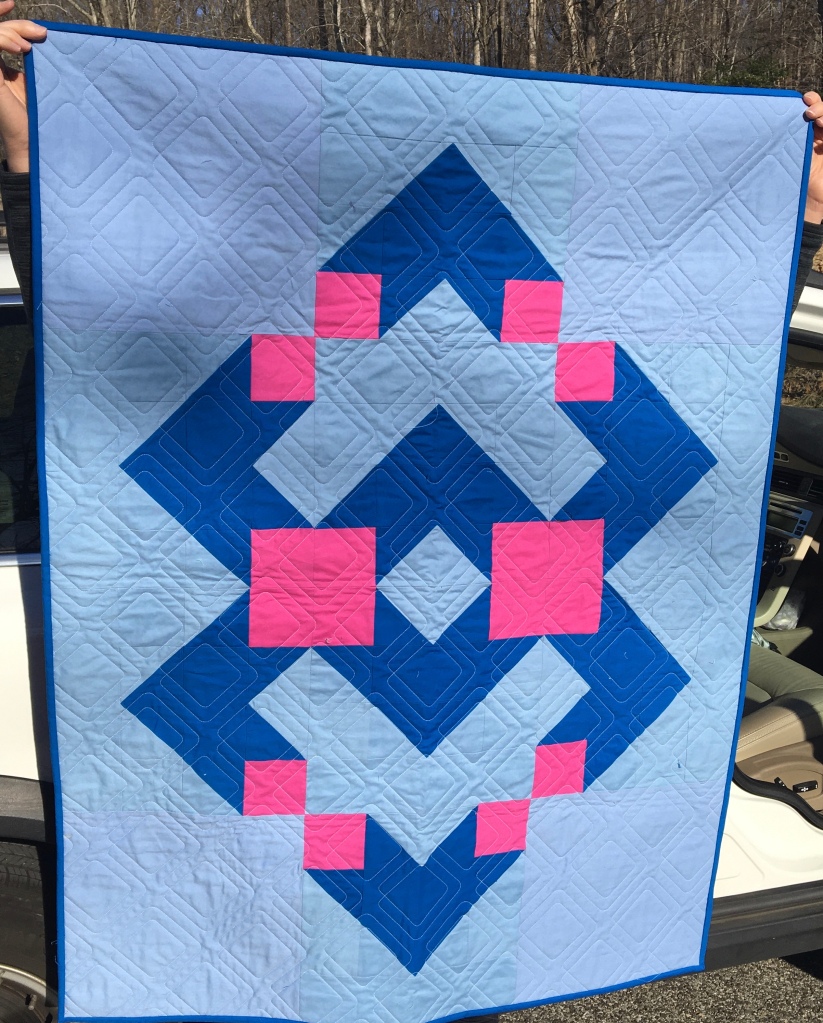
Go Quilt Sewalong
Go Quilt by Lucy Engels – Week 5 so row 4…and the tip this week was to do some chain piecing of the units. It was very dreary outside, but nevertheless I headed to the park behind my house to take a pic so that the purple would look purple and not black. The lighting in my dining room is less than optimal for color accuracy.
See what I mean about the colors? And you get a bit of vintage lace poking through.
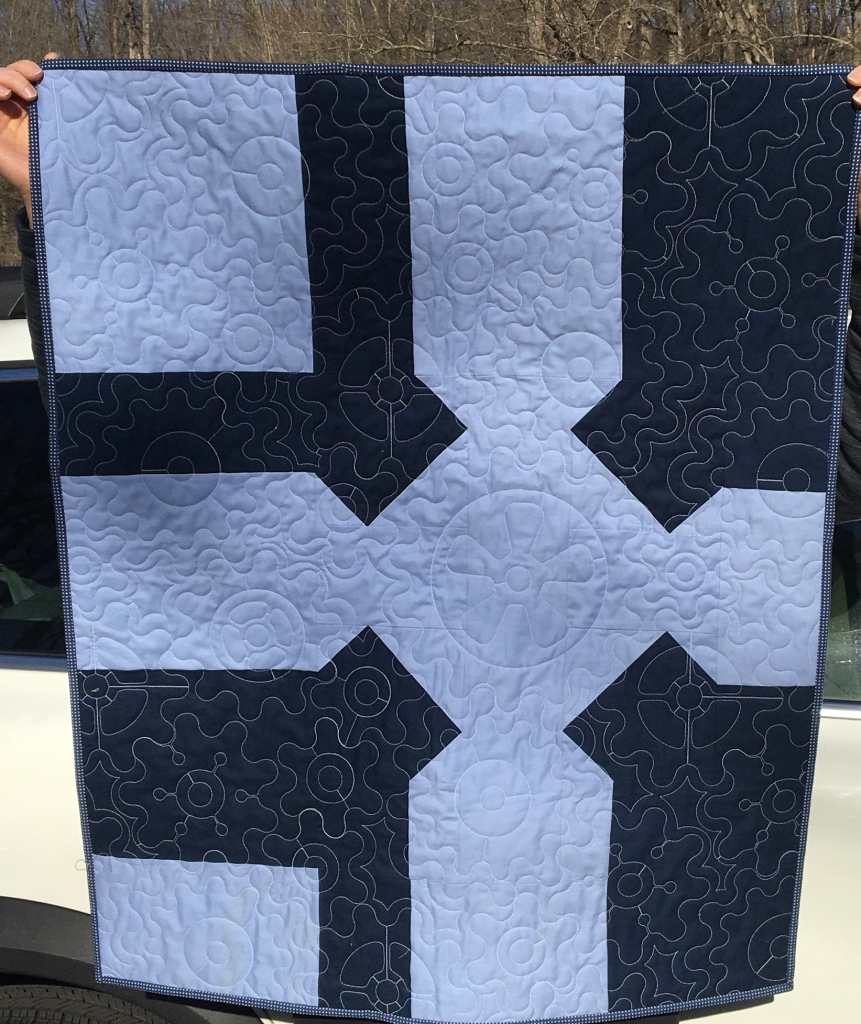
Serenity Circle of do.good.stitches
Not familiar with this group? It is a charity quilting bee. You can find out more about here and even join in the goodness if you wish. I am now the leader of this little group and to get us going for the year I choose a simple block that we have made before, just in a different color. The chunky cross in red, so I made 3 to get us started off.
DCMQG Bee
This month the queen bee asked for a large trip around the world block, one 16″ block instead of two 12″ ones. Soiunds fair, but she is a buddy of mine and making two is not much harder than one, esp for these easy blocks, so two it was. Easy, peasy in these nice relaxing colors, and it even was ok to use some metallics! They remind me of ballet dancers!
So, what do you think, a productive week, eh? Now to think about this neew week. My goals are:
Complete Plaidish top
Vintage Lace Quiltalong – chain piece rows 5 and 6 and start to put rows together
Hmmm…so I started an update last week but never finished it. Not surprising. However, here I am with the 3 sew-alongs…
Plaidish…
Someone in my guild suggested this timeline, so I am going with it:
Complete cutting by January 25th
Complete A blocks by February 1st
Complete B blocks by February 8th
Complete C blocks by February 15th
Sew blocks into top by February 22nd
Baste and Quilt by March 7th
Bind by March 14th
The pieces were all cut on time and sitting in their neat and tidy piles. Somehow I thought that I had until next week to finish the A blocks and so I started on Friday by sewing the navy blocks to the medium rectangles and then light squares to medium rectangles and then yesterday finished sewing them together and pressed. I put them up on the design wall to admire. Just now did I see that the target finish time was when I actually finished them… and here I thought that I was ahead of the game! Here they are for you to admire also.
Vintage Lace QAL
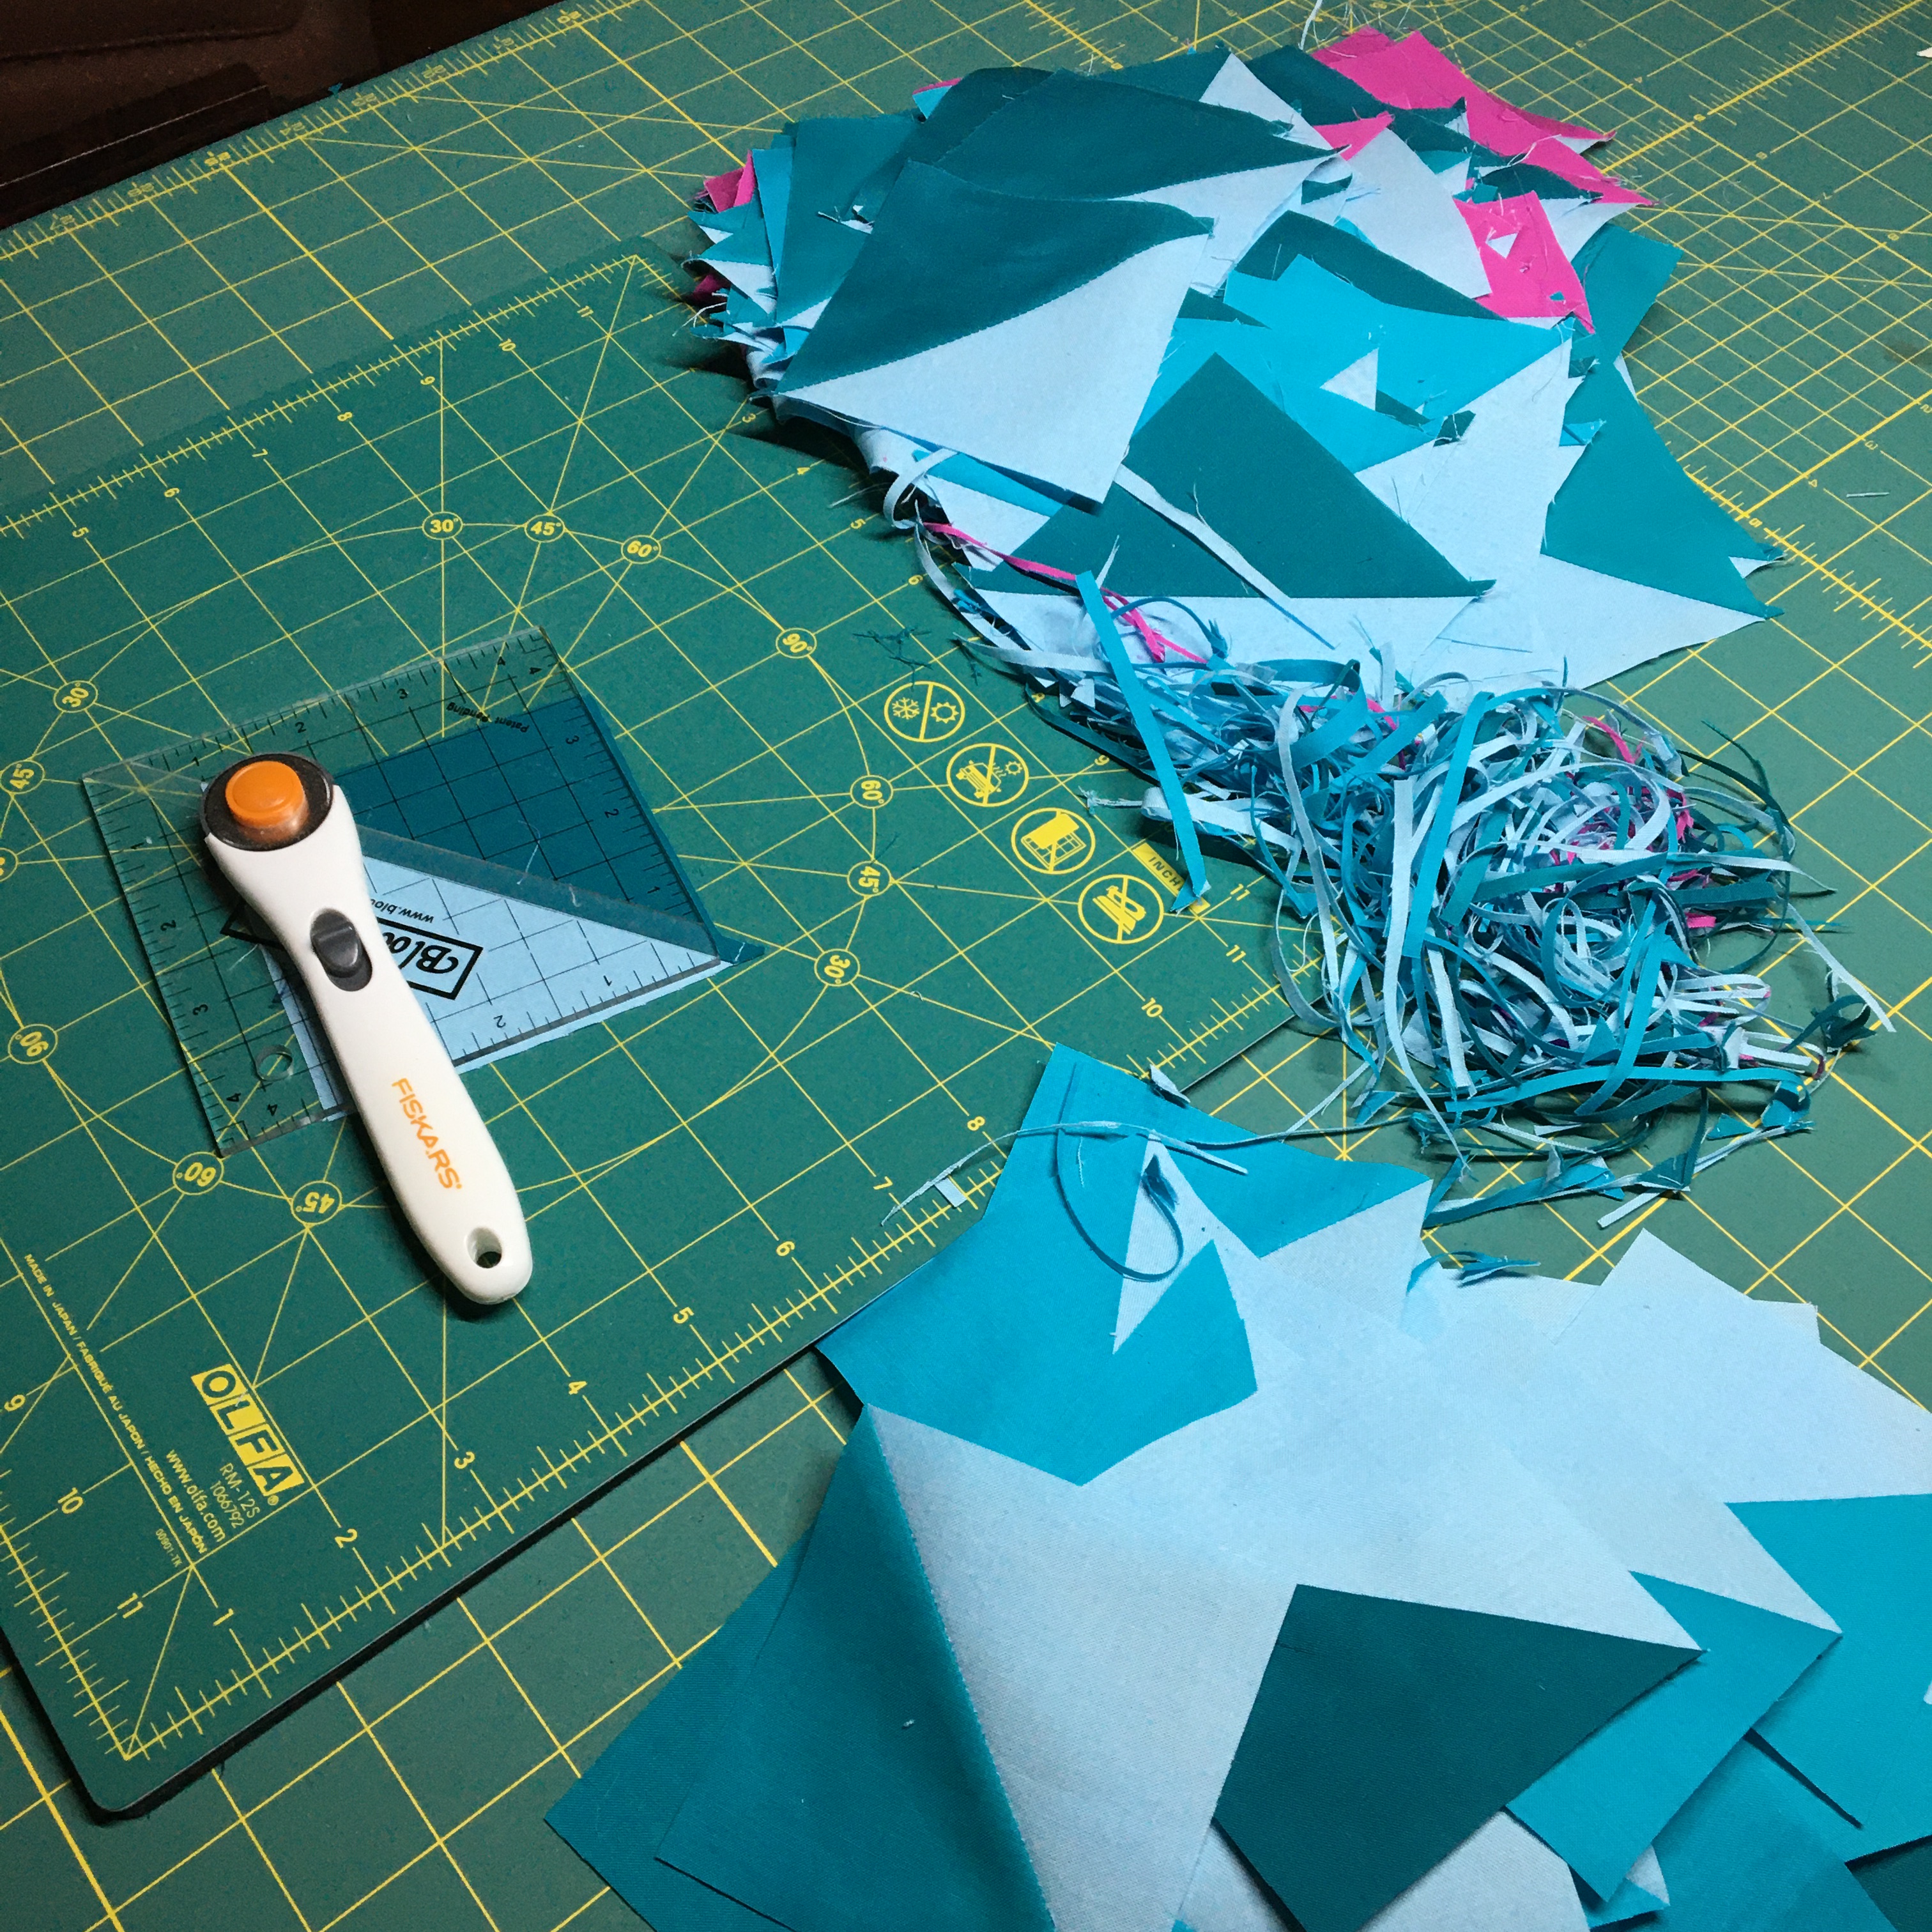
Week 2 was to cut all of the pieces and week 3 was to sew the half-square triangles -henceforth to be know as HSTs – and then cut them apart. I finished the cutting in time for week 2 and completed week 3’s mission early in the week. Trimming…for you non-quilters out there … is something that is tedious and requires precision. I decided to tackle it bit by bit. First I did some of the pink and purples.
Then I just kept it all out and did it 10 or 20 at a time. Not that I counted. Some folks have beautifully aligned towers – I have piles.
Gradually the untrimmed pile became noticeably smaller and that then spurred me on to finish. Audiobooks helped.
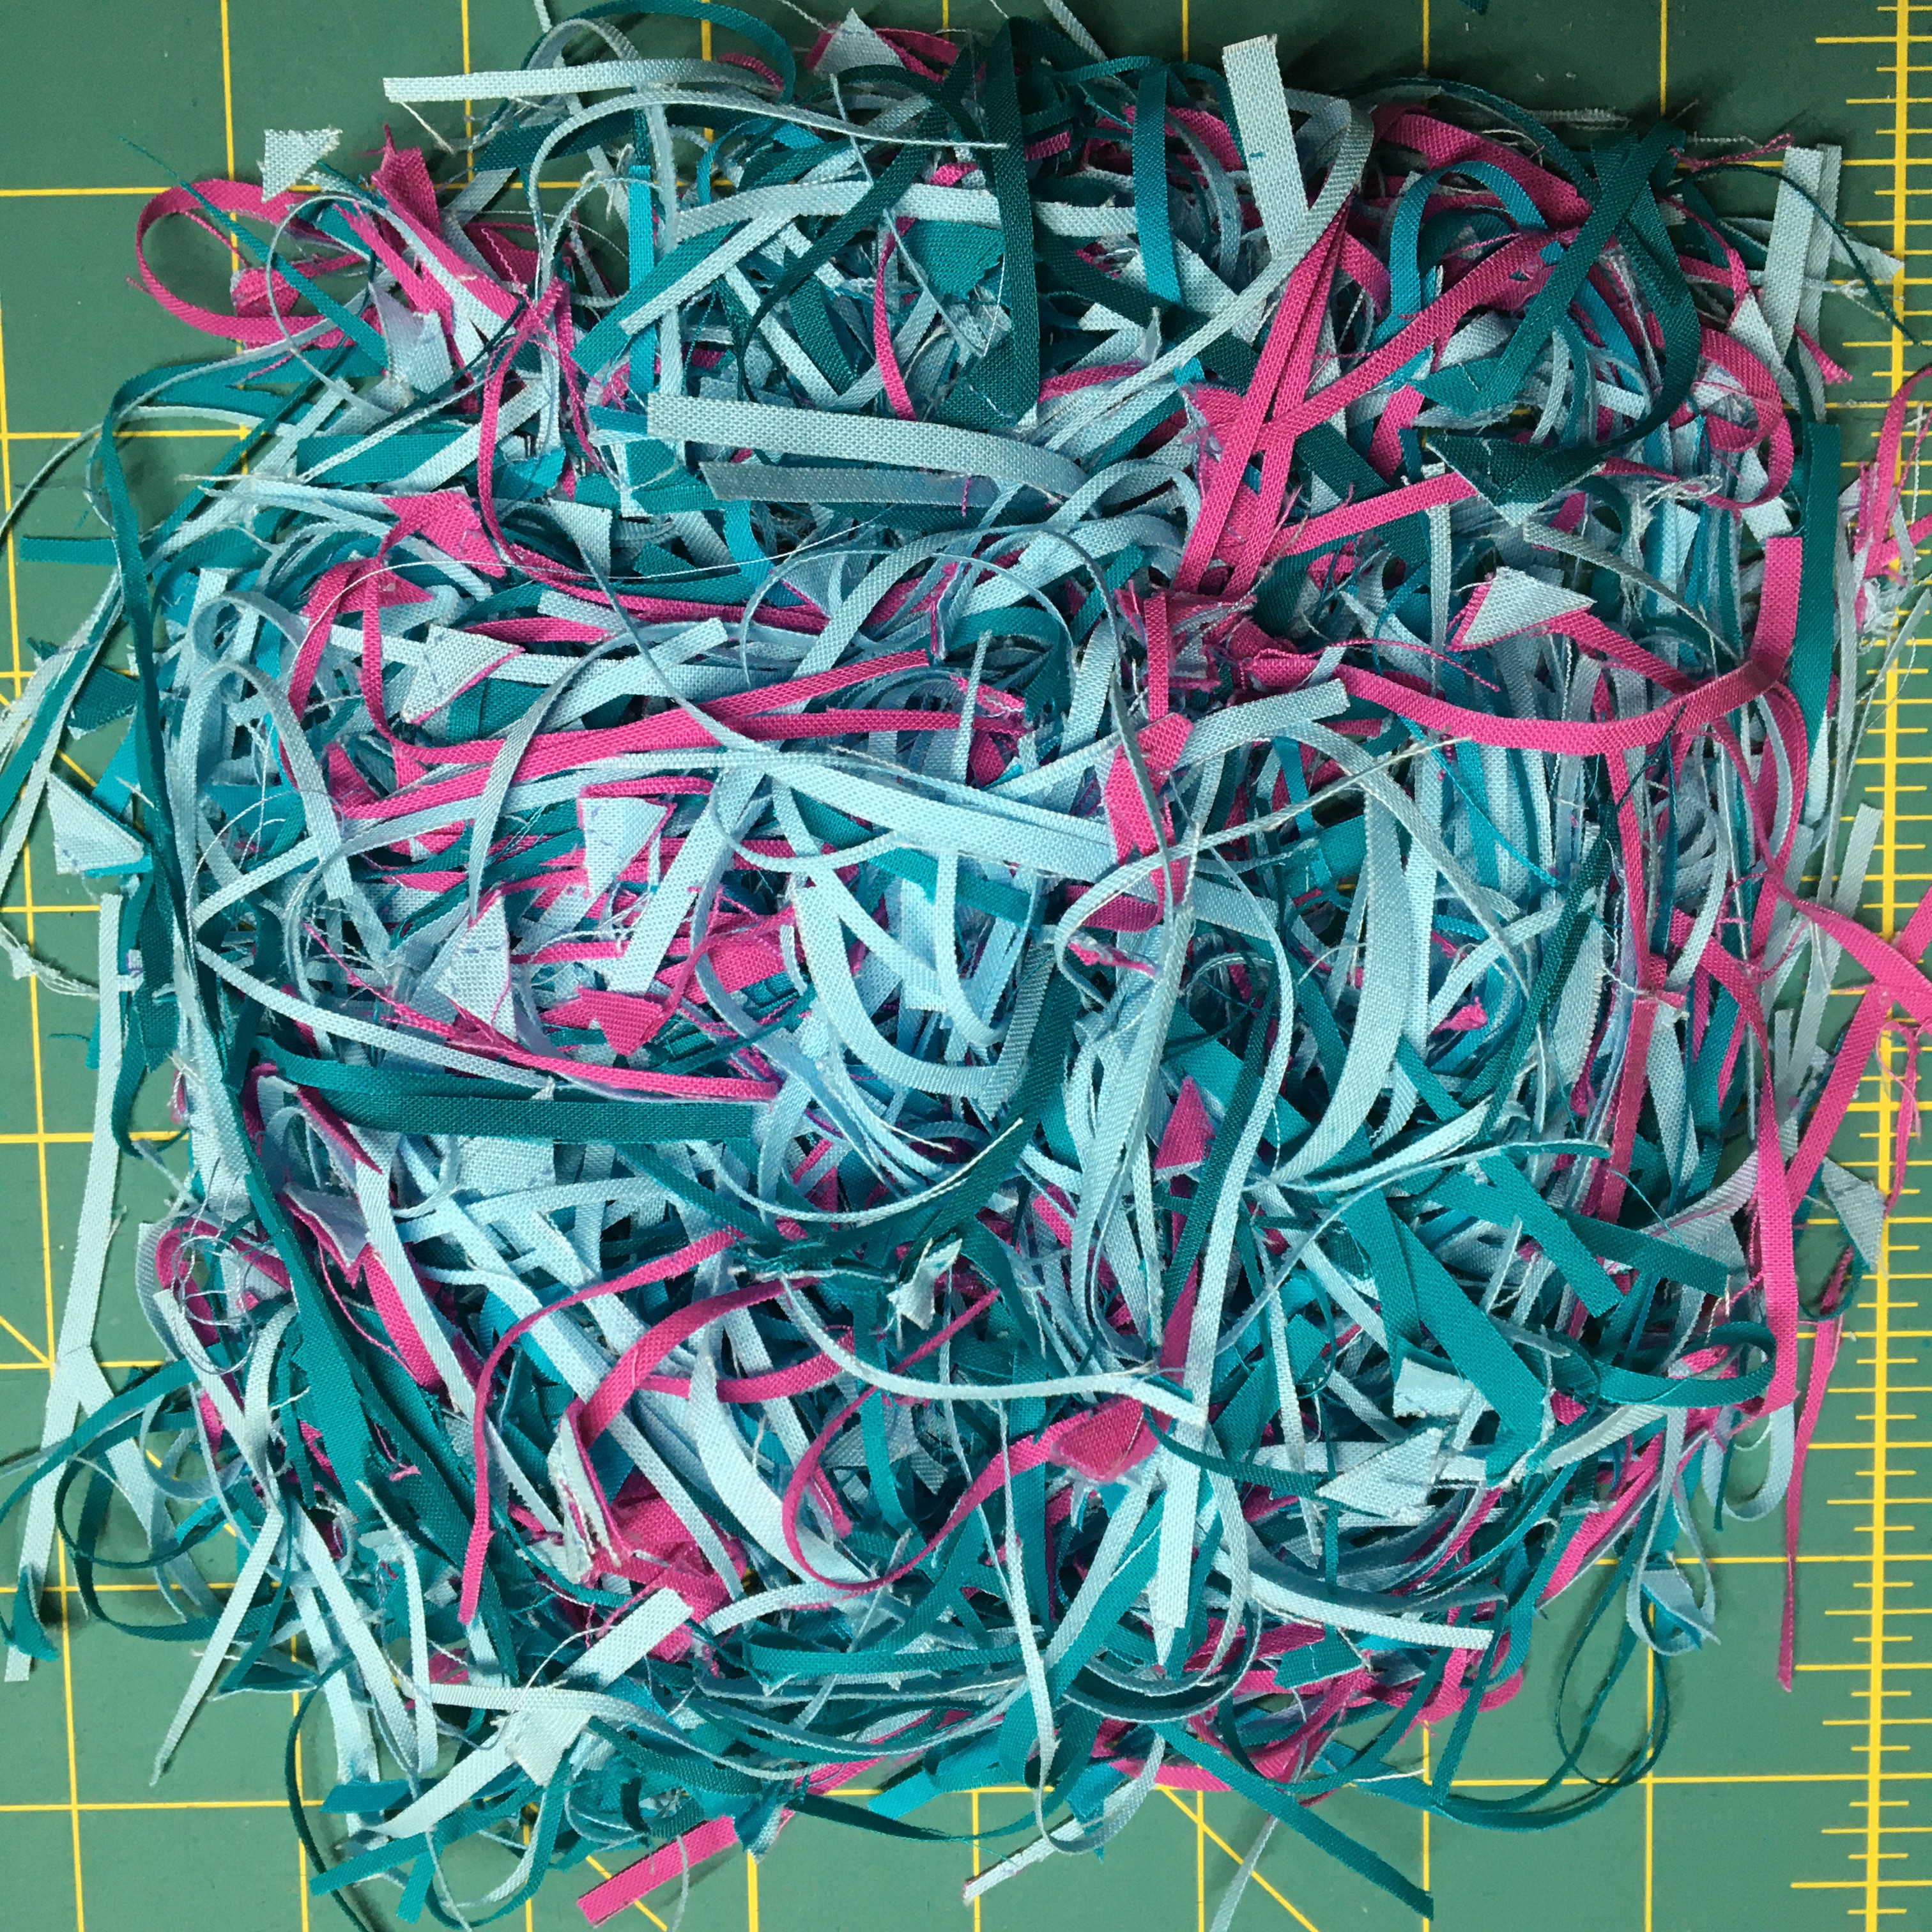
When done I had a lovely little pile of trimmings
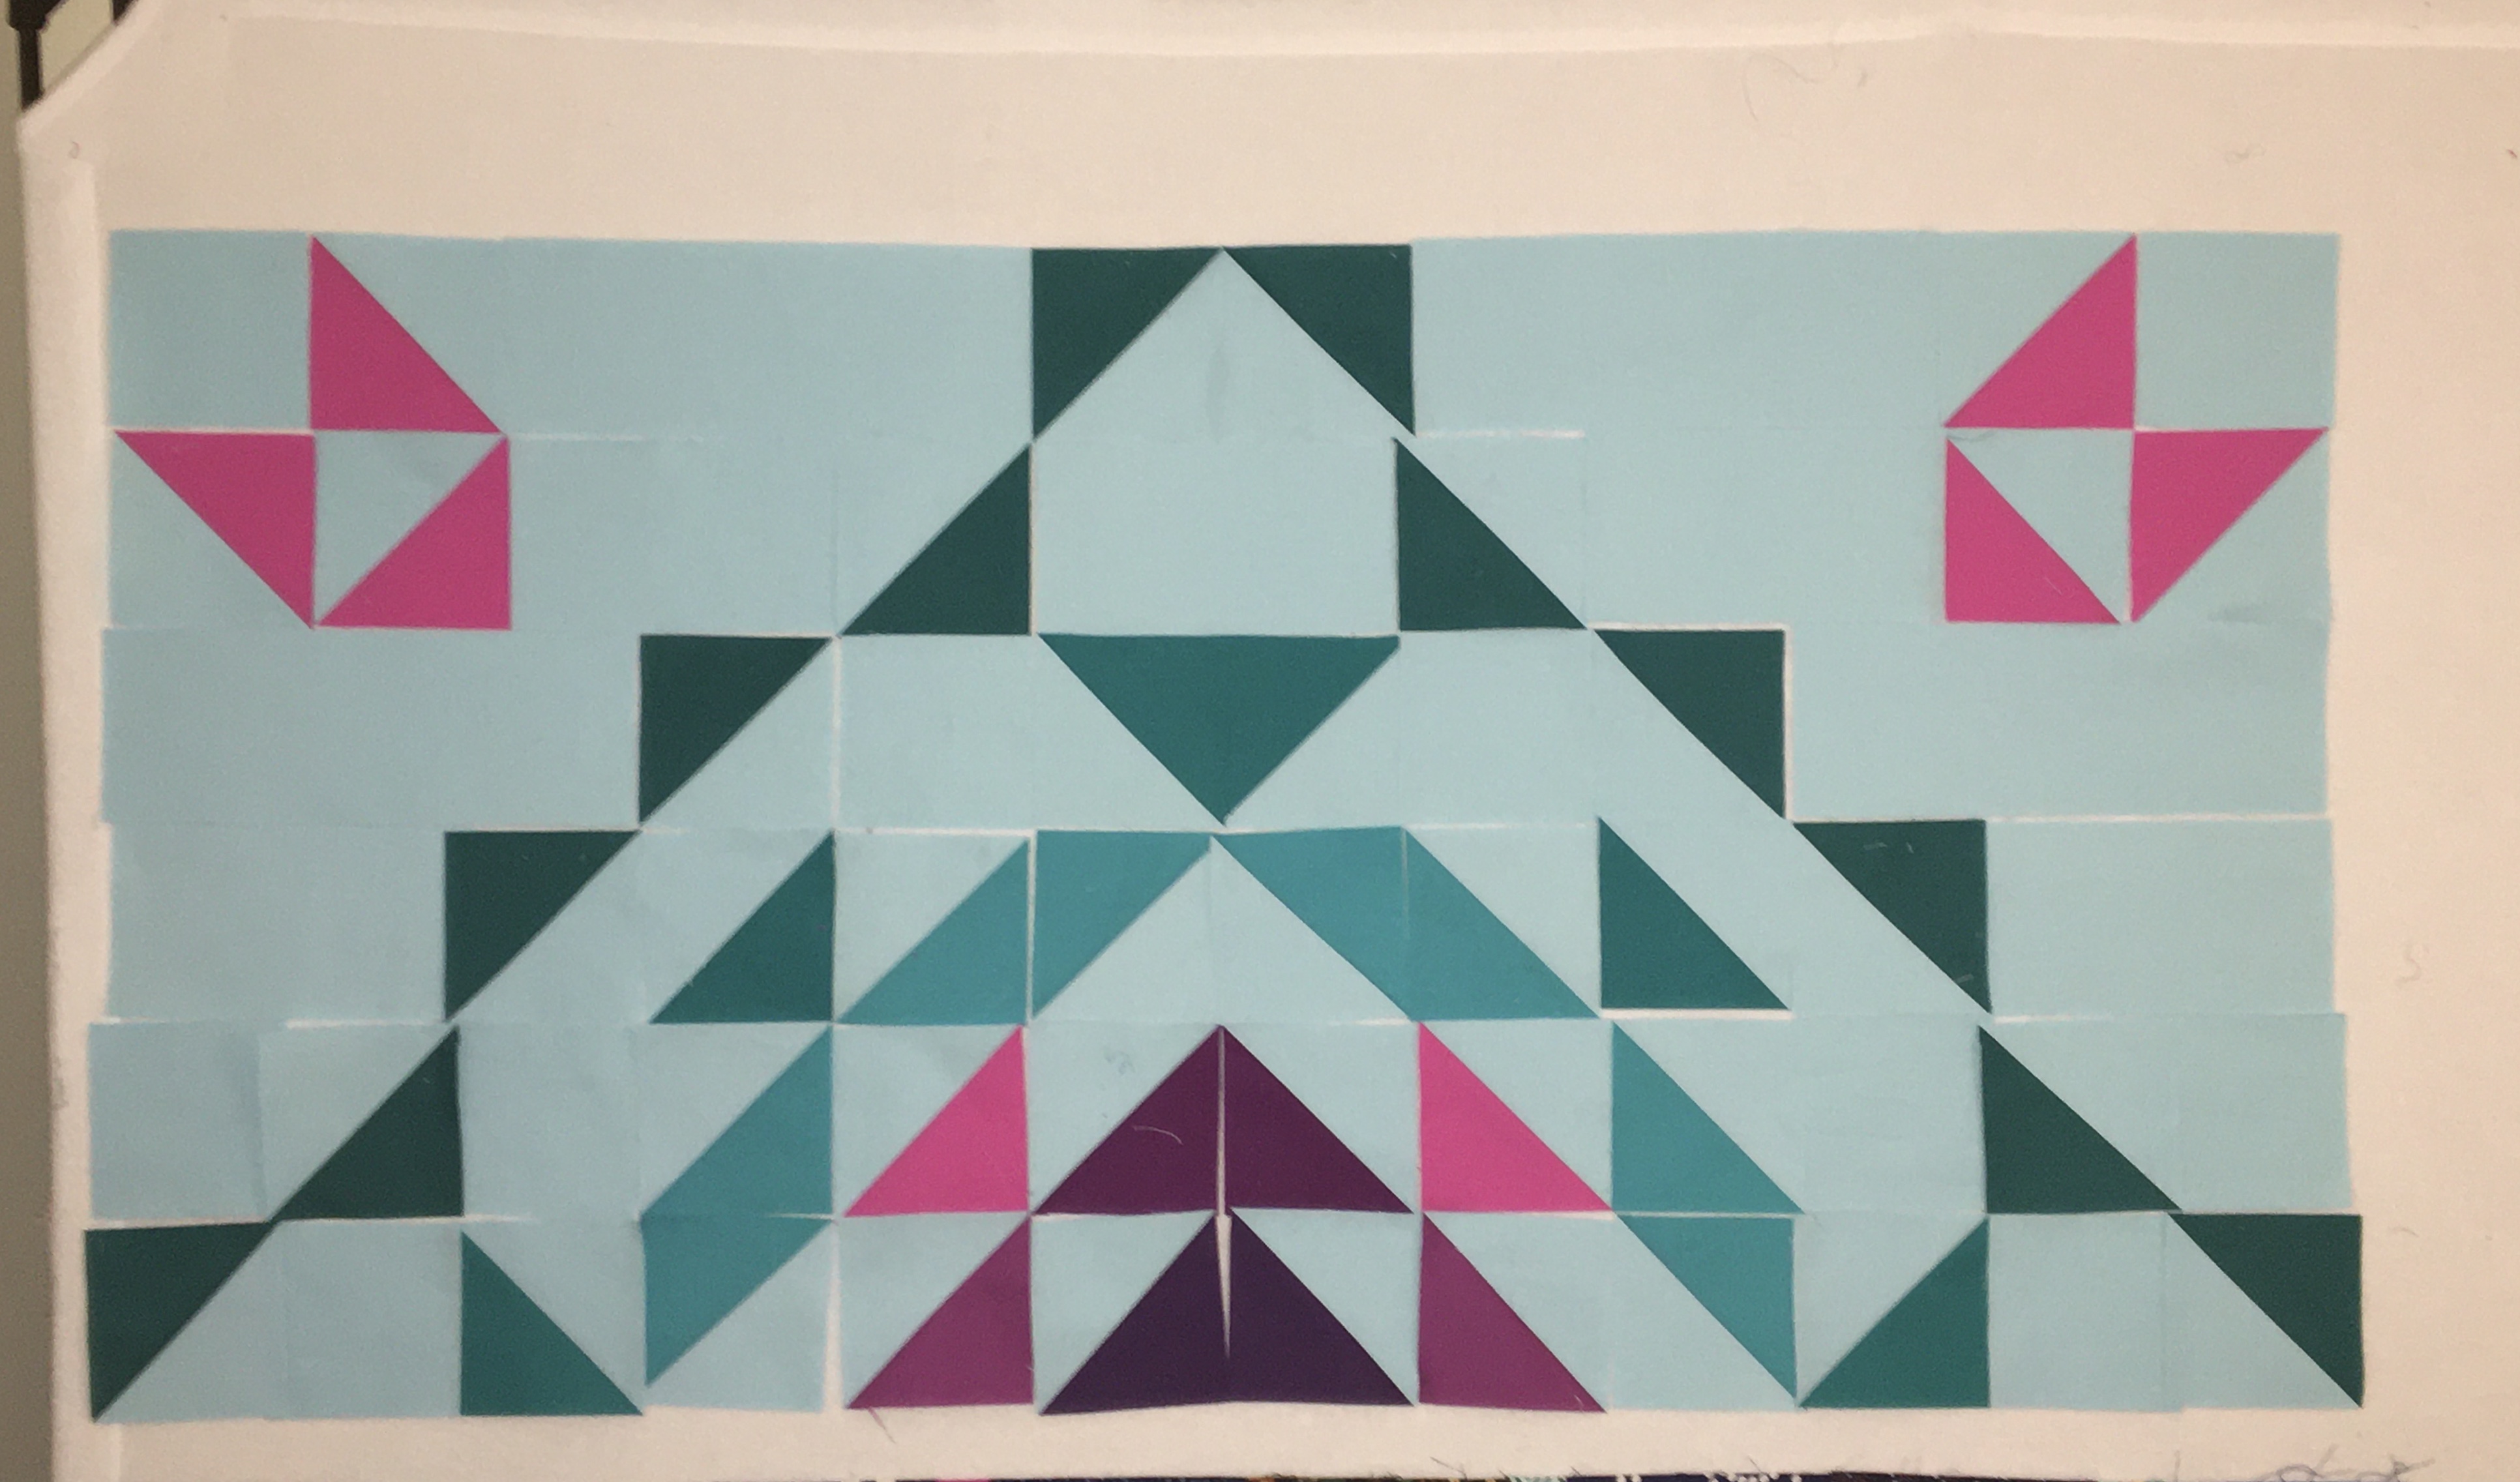
And then I put one unit up on the design wall to check it out.
This is half of a medallion and there will be 8 units like this in the quilt. Pretty pleased so far!
Go Quilt Sewalong
I missed week 1 on this one, but it was just about color choice and perhaps cutting, but I am going from stash/scrappy on this one, so I will choose colors/shop my stash and cut each week. Right on time I finished rows 2 and 3.
I have been taking pictures of them hanging on the laundry door. Better light. Next they spent some time on the design wall. but now are hanging out on the dining room door.
And other things…
I never made or sent anything to my spouse’s siblings’ families for the holidays. Sometimes I do, sometimes I don’t. We are all adults here and it is just as random if they send us anything. Over the years I have made placemats and potholders and mug rugs, etc. It is hard to decide on anything for people you rarely see and don’t see the colors in their homes. However, my spouse was heading there and so I wanted something to send along.
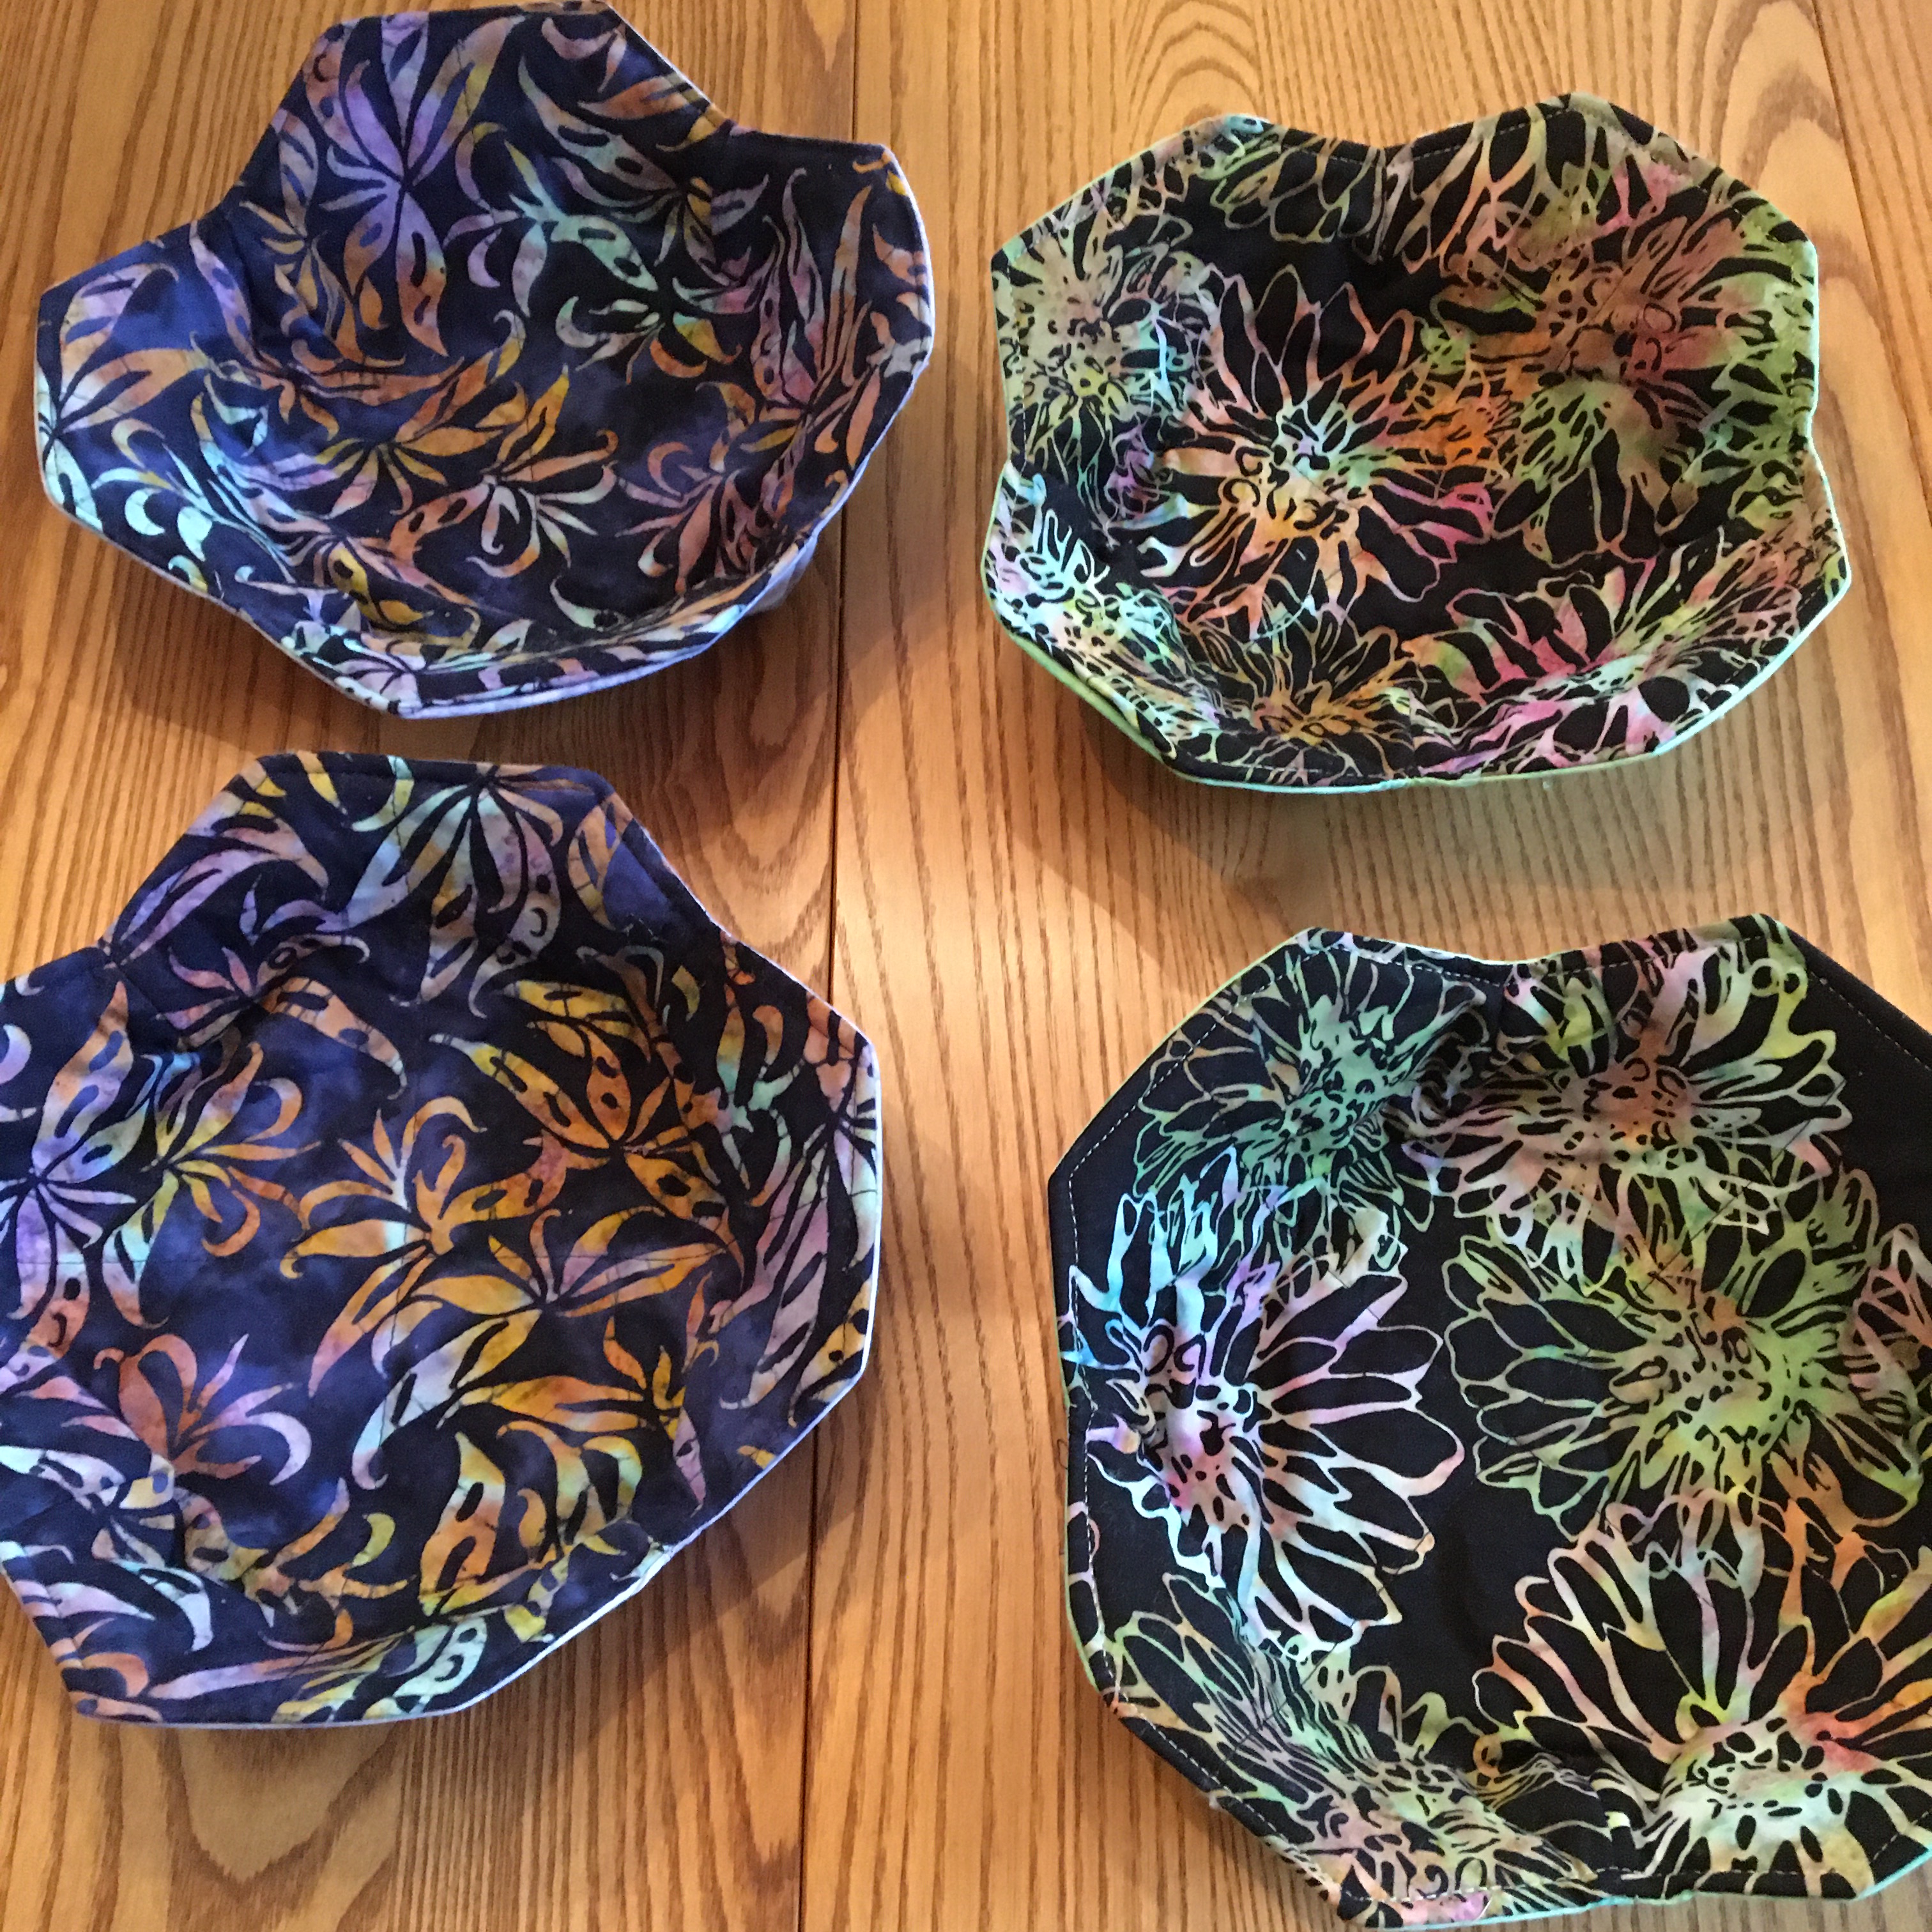
A few years ago I was in some sort of swap – something to do with a soup recipe and something to go with it – and received some bowl cozies. I think the idea is that you put the bowl or mug in the cozy into the microwave and then heat your food. When done, the bowl or mug will be hot but the cozy not. You would need to be really sure that the fabric, batting and thread are all cotton and can take the heat. However, that is not how we use them. When we are not eating at the table we use them so we are not holding a really hot bowl. Hmm, I am pretty sure that they don’t always eat at the table.
OK, now I had an idea. I found several tutorials on the web and decided to use this one from Bluprint. I like the shape in that it did not have pointy corners. I know that the sibs like batiks, so I went into my old batik bin and came out with some contenders. Here are the finished cozies.
If I was to make more of these – which I am likely to do – I would make two changes. I would make the darts 0.25″ – 0.5″ longer to make a deeper cozy. Also, since this was a total stash project, I used scraps of batting left over. And, since I generally use thinner batting for quilts, I had thin batting for scraps. I would use an extra layer of batting, or maybe even a layer of Insul-brite. I was pretty much out of Insul-brite after my attempts at making oven mitts… a story for another time. For some reason all of the stores around me were out of Insul-brite, so that was not happening. Plus, you need to be darn sure that you don’t put the Insul-brite in the microwave. So…done, sent off.
Still reading?
Goals for this week:
– 3 read and white chunky cross blocks for Serenity Circle of do. Good Stitches
I know that my friends will think that I am crazy…3 sewalongs? All at the same time? And while doing some prep this morning I was thinking about do so many sewalongs start in January? New year, new resolutions? Or for us in the northern hemisphere it is winter so a better time to stay in and sew when it is colder outside?
It all started a few weeks ago when a friend asked if anyone had promising sewalongs coming up. She had seen the Vintage Lace Quilt-Along by Brittany Lloyd of @loandbeholdstitchery and I thought that was lovely. Someone brought up the Plaidish Quilt , a tutorial by Erica Taylor Jackman of @kitchentablequilting and a bunch of my quild mates jumped aboard that idea. And as I was poking around I found a post listing a bunch of quilt-alongs and sew-alongs and came across the Go Quilt by Lucy Engels
So, here is where I am with each of them – yes, three of them.
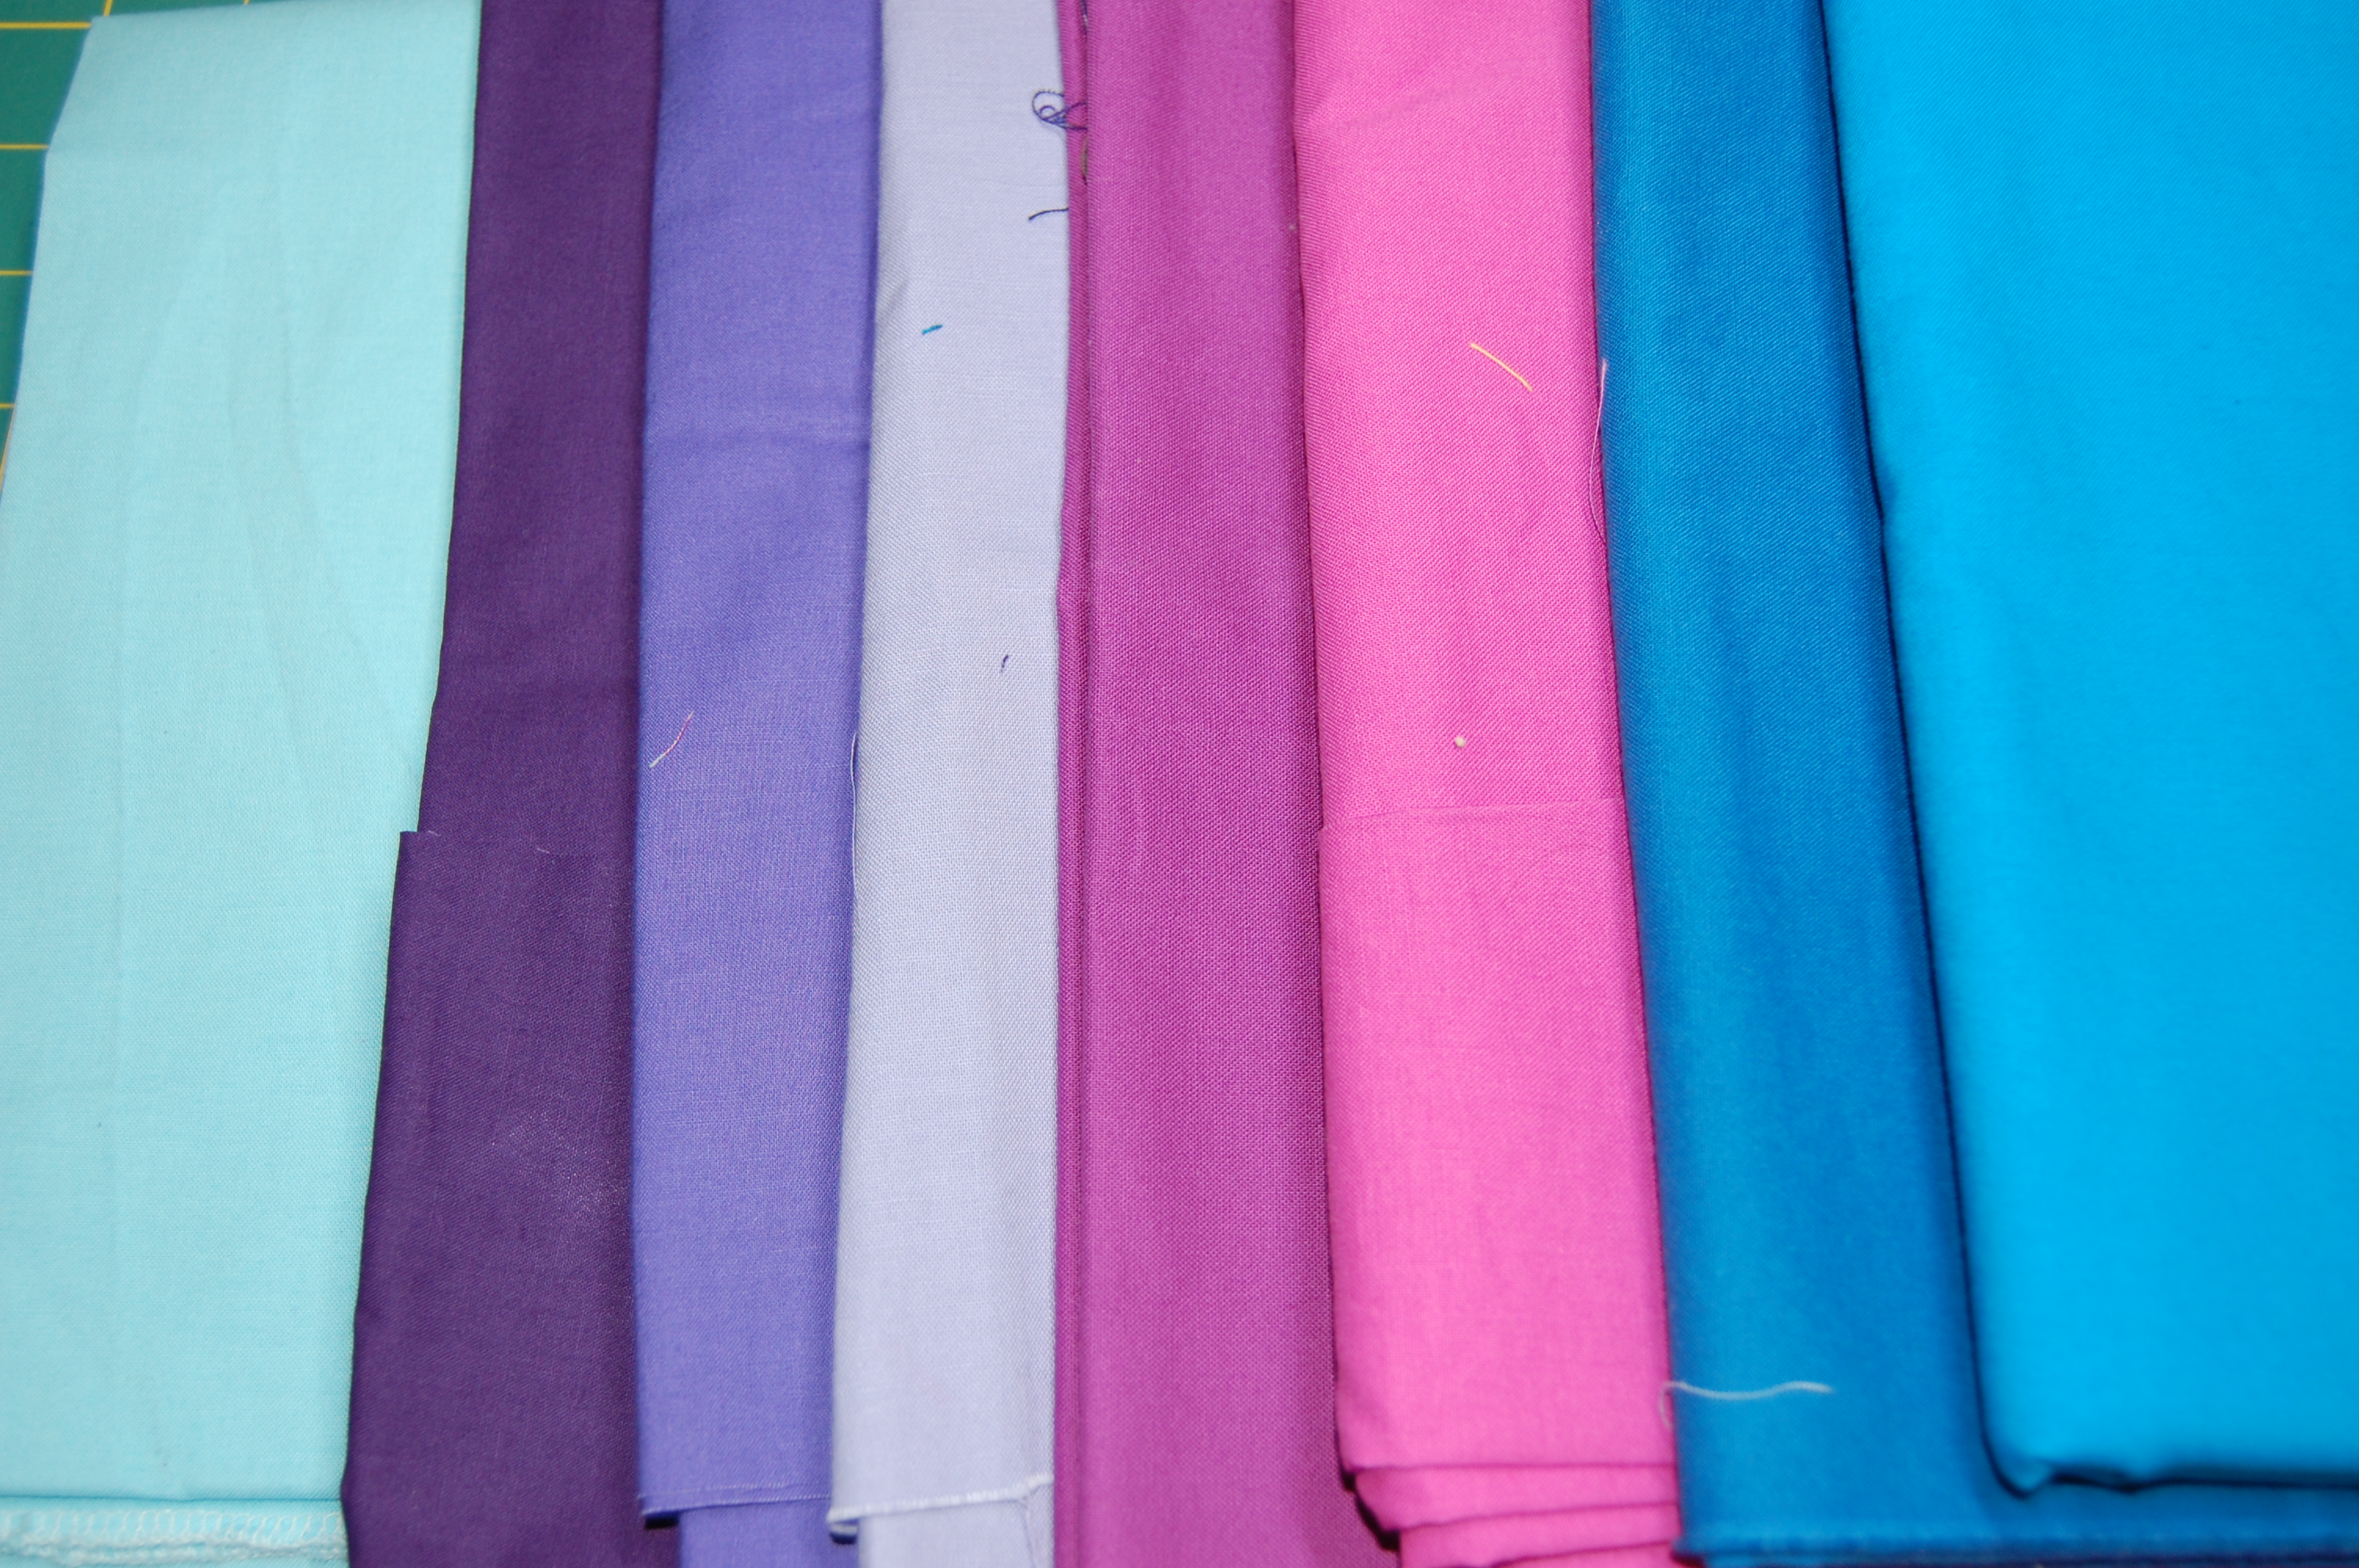
Vintage Lace Quilt started this week and the first week is posting your fabric pull. Done! I have several yards of the aqua on the left and that will be my background color. I am still playing around with which color will go where and must decide before next week which is cutting. There is a color page, so maybe I will see if that can help me decide.
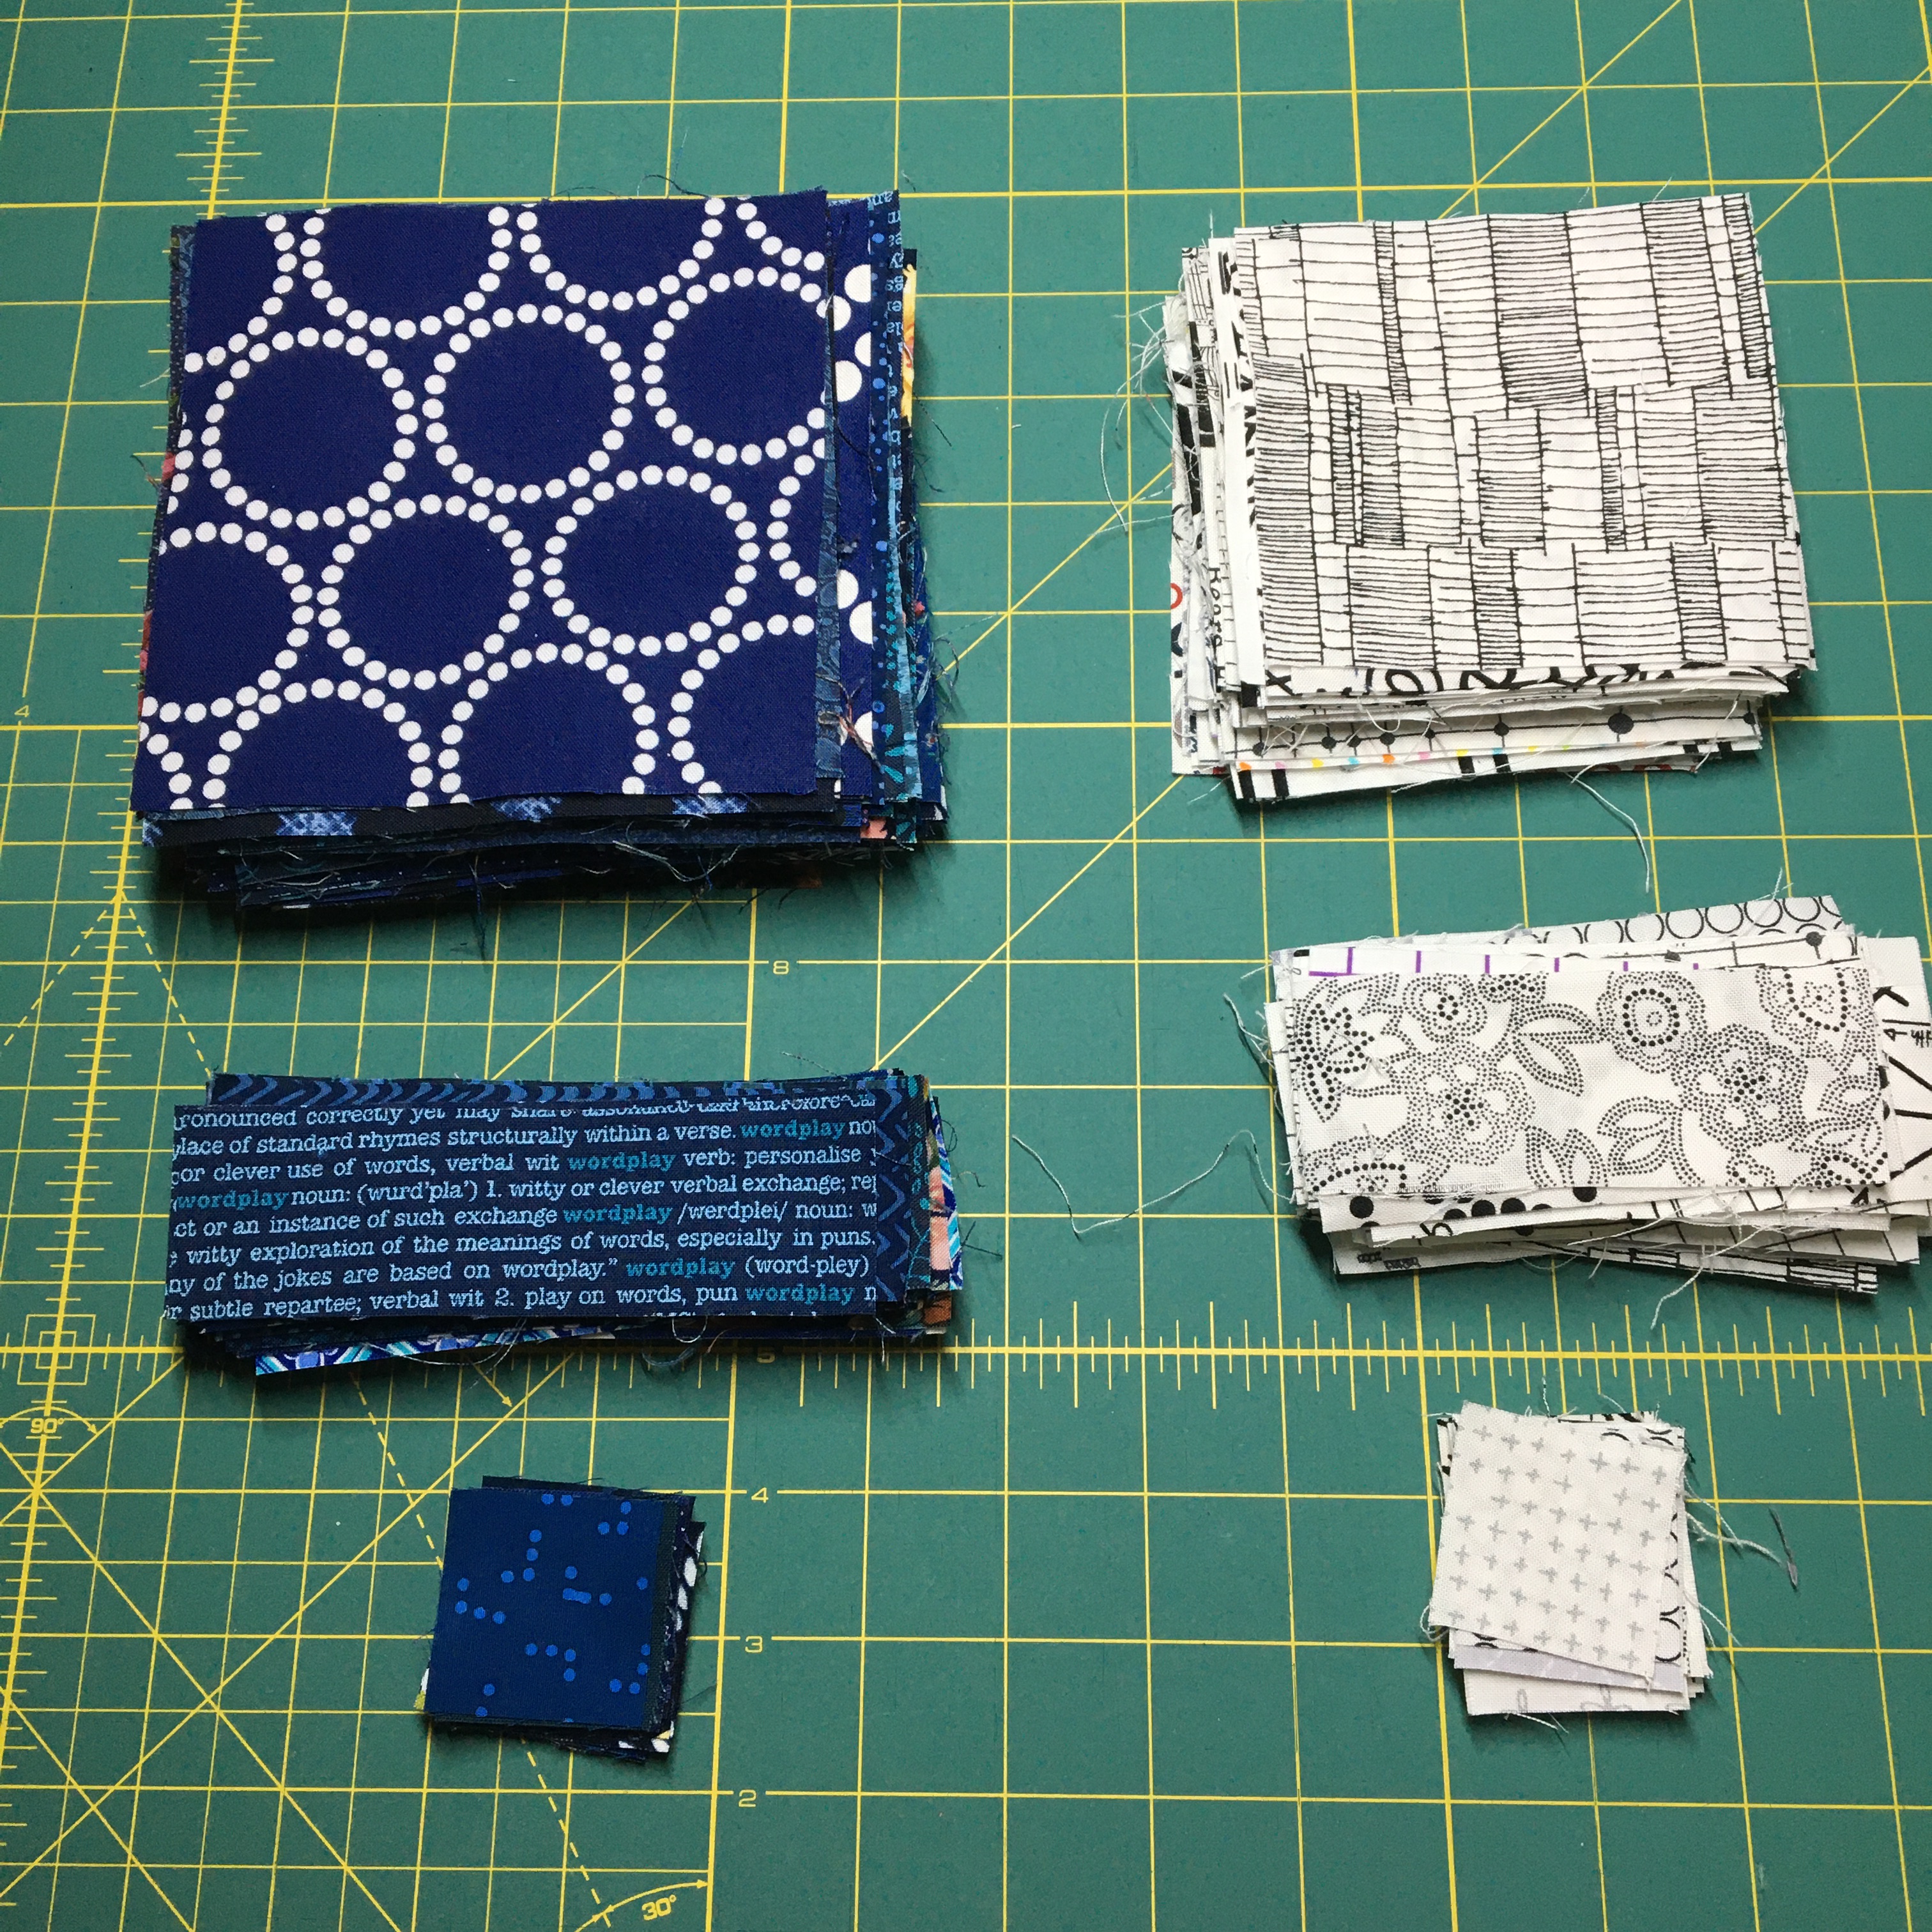
The Plaidish Quilt is not an official quilt-along, just an unofficial thing with some of my guild mates. You can follow along our Plaidish adventures here. The quilt is constructed using three collections of fabric: dark value, intermediate value and light value. For the dark value I reached for my bin of blues and pulled cut the navy and dark blues. I have lots of low value scraps, so I cut those up for the light value. I am on the fence for the intermediate value, whether to go for just aqua or to include other colors also. I think I will start with the aqua and see how it goes.
And the GO quilt…I missed the first week which I believe was probably just fabric selection. The pattern shows using 5 colors but that means some quantity of each color, and that would limit the colors that I could use. I have decided to keep with all solids, using a light blue as my background as I have plenty of that color. I have made the first row of blocks, and am thinking that I will just use up scraps, trying to keep the background color where it is in the pattern. So far, so good.
To keep myself accountable, I will try to post each week…ha, ha…we will see how that goes!
We have reached the end of Quarter 4 of the 2019 Finish-A-Long!!
Of course, this means it is now time to link up those finishes from the
list you linked up in October. We hope that you have been able to complete
a lot of the UFOs from your list and have had an overall successful year.
The 2019 FAL is hosted by a great community of bloggers. This year our hosts are:
Each finish you link up will be in the draw for great prizes, so let’s give a huge thank you to our fantastic sponsors:
Winner’s Choice of 1 Large 12 Spool Collection
$80 Gift Certificate
$50 Gift Certificate
$25 Gift Certificate
3 PDF Patterns
2 PDF Patterns
2 PDF Patterns
1 Six Month Subscription
2 PDF Patterns
$30 Fabric Voucher
The 2019 Quarter 4 link for your finishes is now open below on my blog and on each of the hosting blogs – you only need to link on one blog for your finish to appear on on all host blogs.
Link-up “Rules”:
Add one link for each finish. If you want to link a round up post of all
your finishes, use that link to enter one of your finishes and then link
the rest of your finishes separately. Please, only one link per
finish, as your link is an entry into the randomly drawn prize draws.
Please ensure that the photo (Instagram or Flickr) or blog post you link up
contains a link or reference back to your original list so that we can
verify your entry (make sure it is from the right quarter, too).
On Instagram the best way to do that is to tag your photos with #2019FALQ4yourname (where yourname is unique to you), this makes it easier for us to match your finishes with your list, which also should have this tag.
Please become part of the FAL community. Check out the links of others and
leave a comment. We all need encouragement so let’s applaud each other.
The 2019 FAL Facebook page is HERE and you can follow us on Instagram @finishalong.
Our hosts will also link up their finishes to share in the community but they are not eligible for any of the prizes.
The Q4 Finishes link will stay open from now thru 11 pm, EST, Thursday, January 9, 2020 – as we are global, you might want to check your time zone to determine your last possible time to link. You can also see how much time is left below the linked up images on the right. It is best to link up your finishes early and if you have a last minute one, add that one later so you don’t miss out. The prizes will be awarded as soon as we can verify all the entries and do the drawings. We will post the winners on each host’s blog.
working on things at my own pace...sometimes undoing what I have just done (tinking as in knitting backwards) until I get it so I am happy. Welcome! Please look around.


")
")